Farb Highpass – Manual
Analog Transistor Ladder Highpass Filter with Tilt and Resonance CV
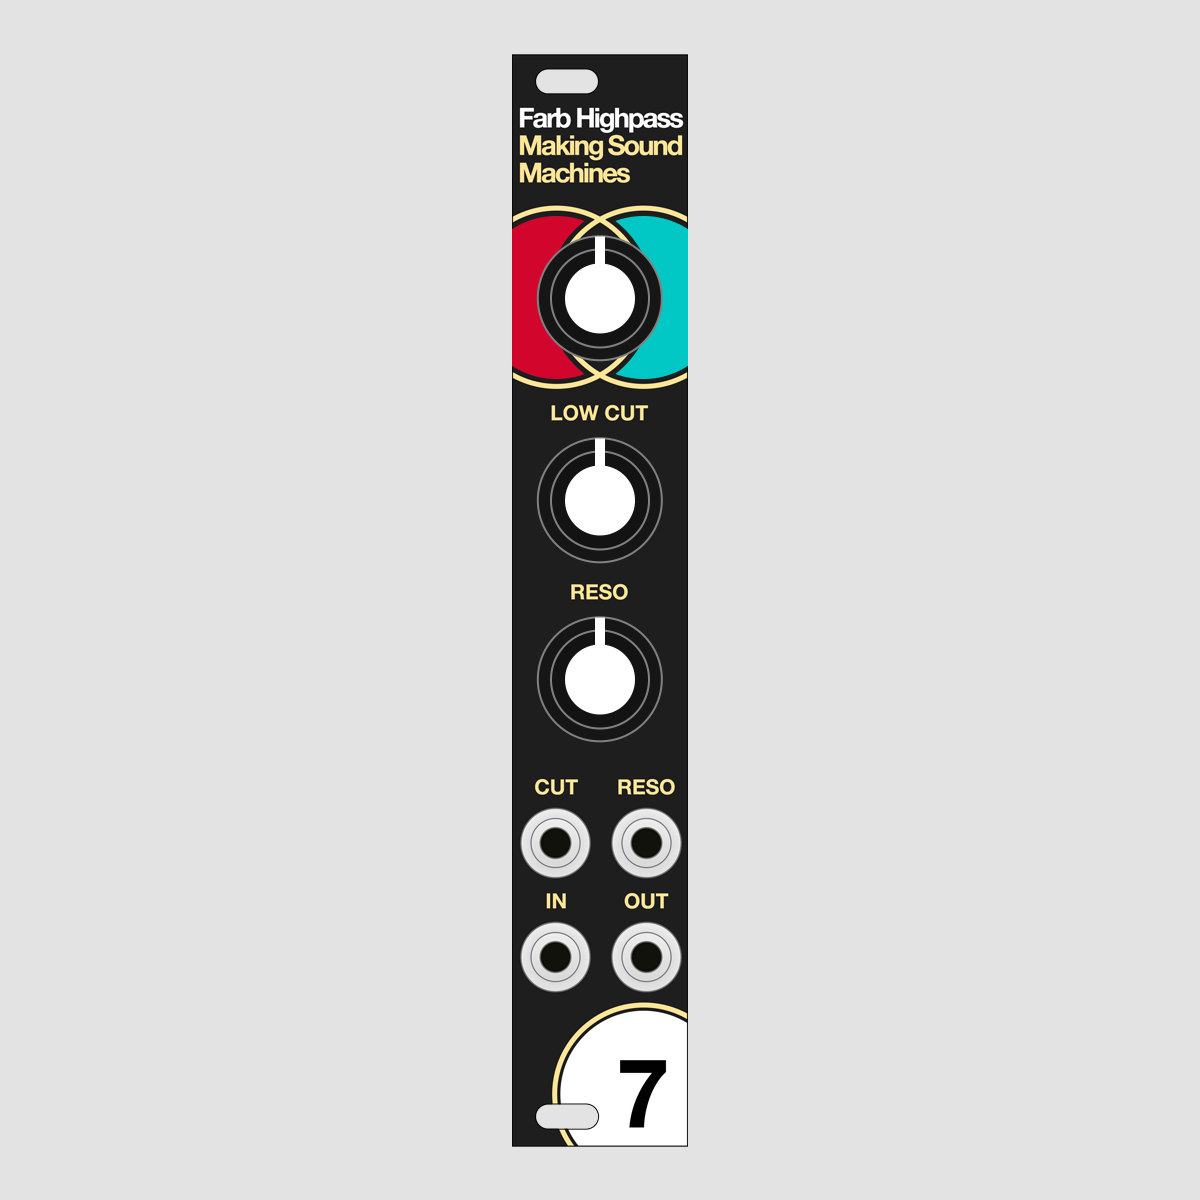
Farb Highpass is an analog transistor ladder highpass filter for Eurorack. It features a Tilt EQ as a frequency bias stage, as well as CV controlled cutoff and resonance.
We have always been fascinated with analogue effects circuits, and we love the way their quirks and nonlinearities inspire us to find new sounds.
Farb Highpass features a distinct circuit from the classic lowpass ladder. We tweaked the circuit and added CV-able resonance to the feedback path.
This module crosses the sonic richness of the classic East Coast highpass ladder filter with added fine control from its weighted input stage.
It is part of our Farbfilter (colour filter) range of sound colouring modules, offering a wide sonic palette from lending glowing warmth to electric sizzle in 4HP.
Quickstart Guide#
You are reading the Farb Highpass web manual, which takes an in-depth look at the ideas behind the module.
Farbfolder comes with a printed quickstart guide as well. Here you can find the PDF.
Connect to power#
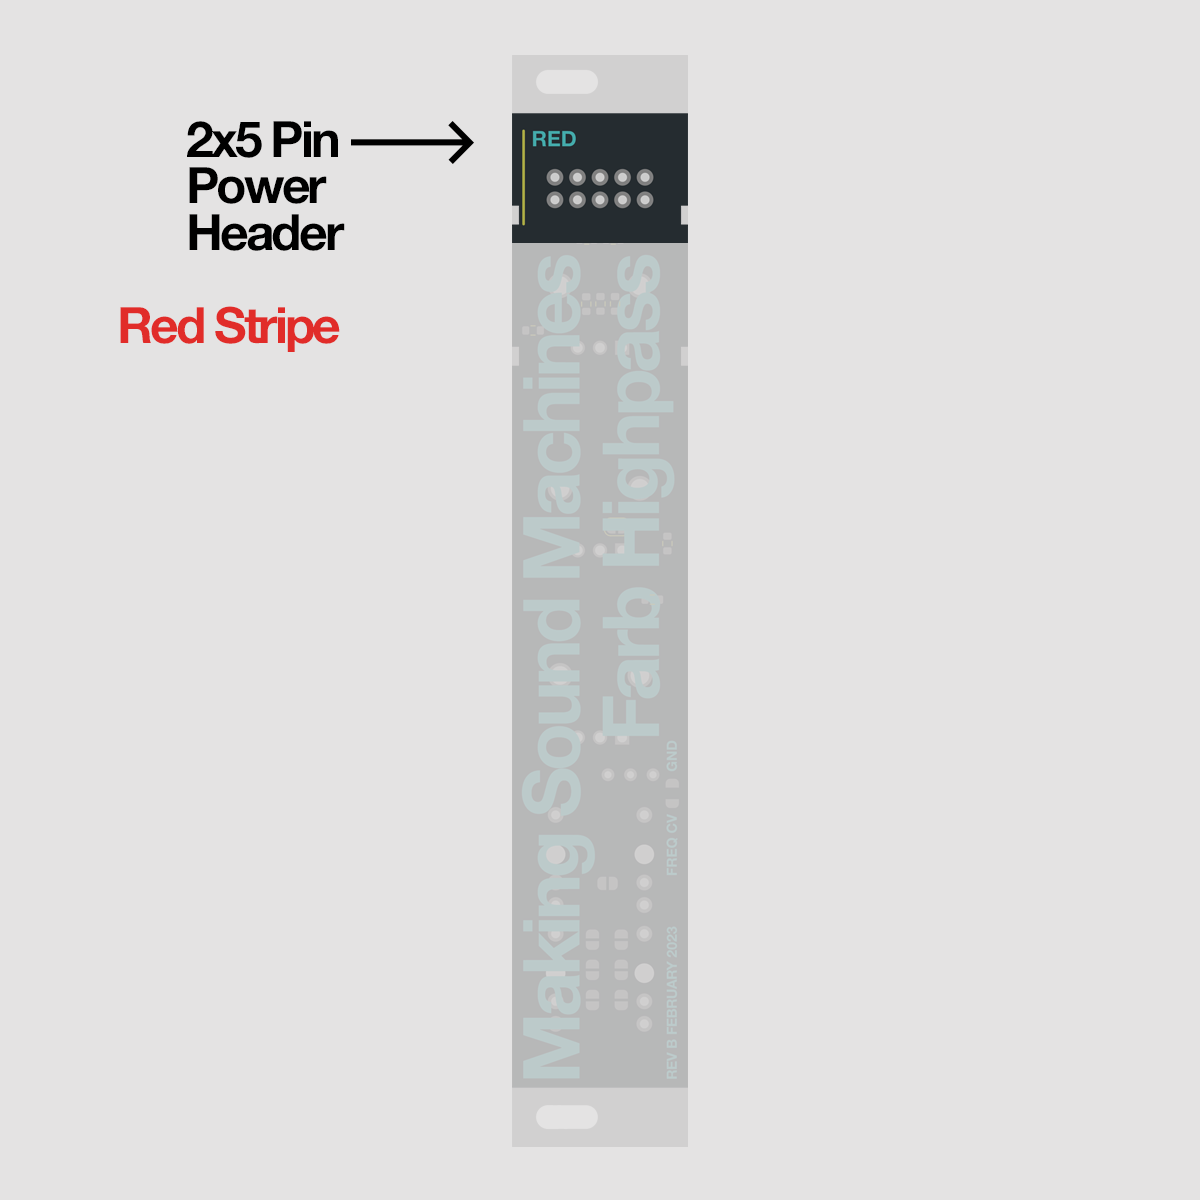
Farb Highpass requires a -12V / +12V Eurorack power supply. Connect the 2x5 pin header on the back to the bus board of your Eurorack case using the included ribbon cable.
The red stripe on the ribbon cable needs to match the Red Stripe mark on both Farb Highpass and bus board.
The power consumption is: +12V 85 mA / -12V 50 mA
Audio In + Out#
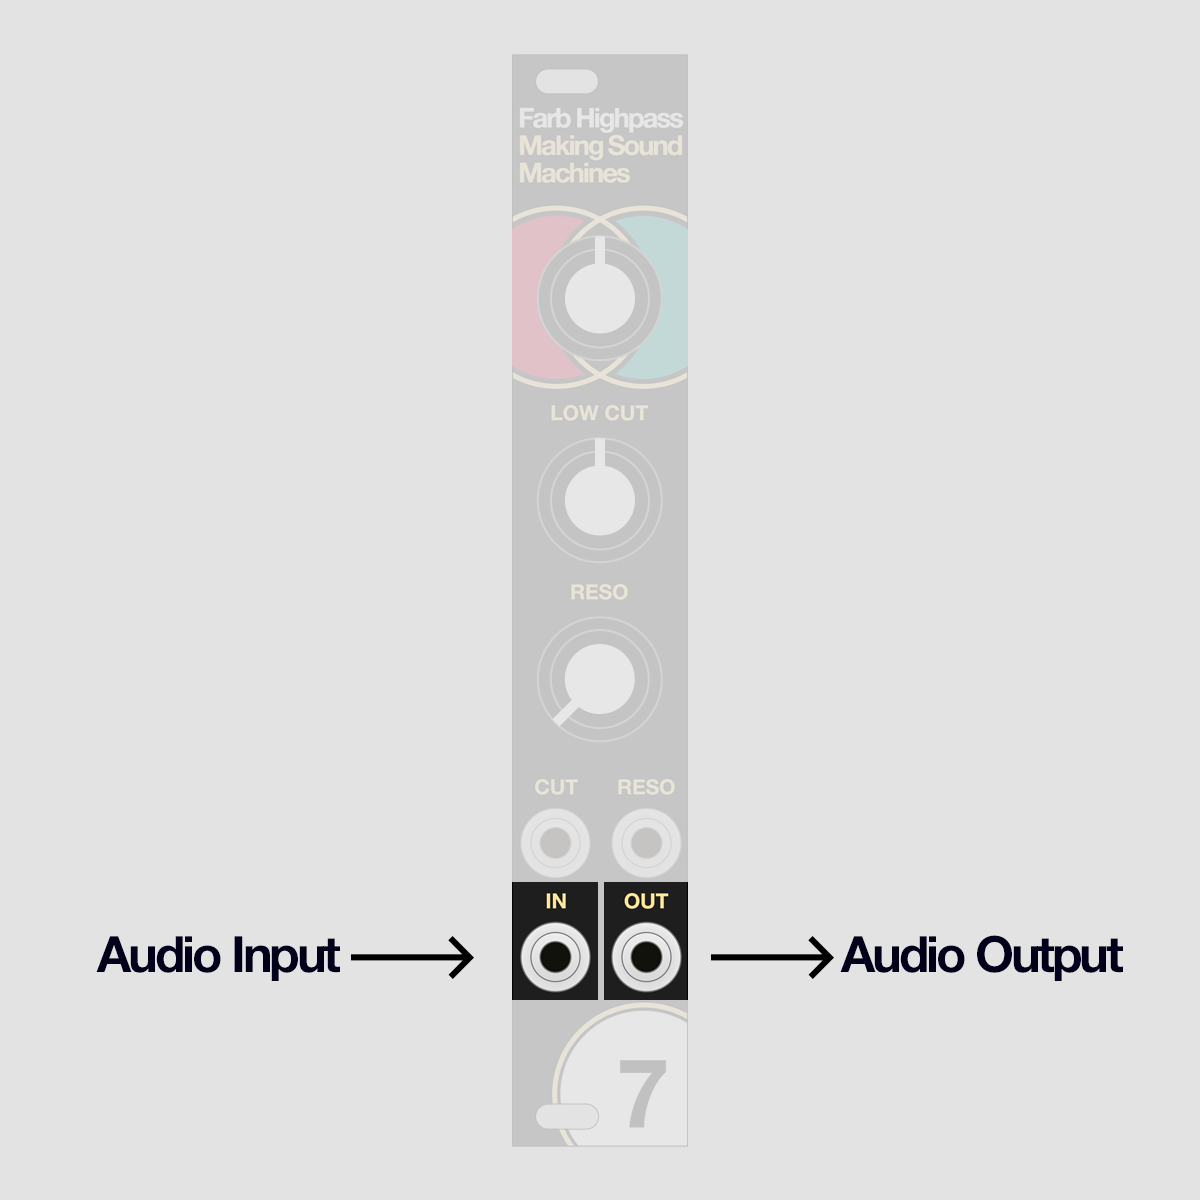
Patch an audio signal into the Audio In jack. You will find it on the bottom left of the module.
The Audio input expects a -5V /+5V range.
The Audio Out jack, on the bottom right of the module, provides the processed output signal.
Tilt EQ#

Turn the topmost knob to set the frequency bias of the module - this Tilt EQ will give you extra flexibility and fine control in shaping the frequency spectrum of the signal.
A setting at 12 o’clock is neutral and will give you the classic sound of the ladder highpass filter.
Turning the knob counterclockwise will gradually add warmth to the signal, emphasizing the bass frequencies. This is useful to give the highpassed signal a thick and round sound.
Turning the knob clockwise will gradually add brightness to the signal, boosting the treble frequencies. This is useful to emphasize the highpass effect, giving the signal a sizzling and shiny character.
Cutoff#
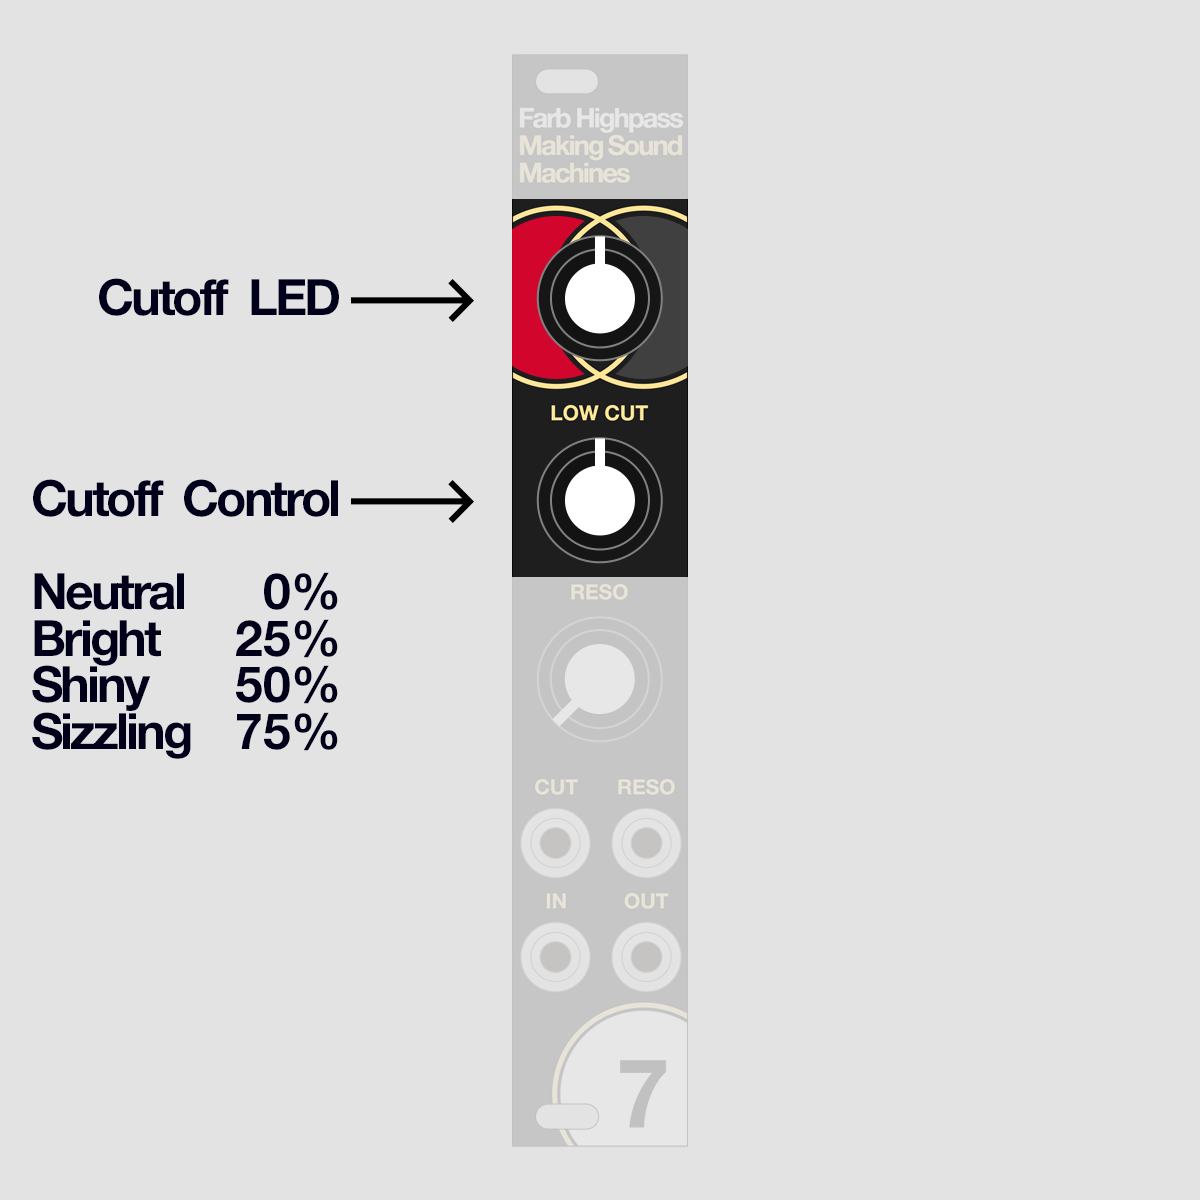
Turn the Cutoff frequency knob to sweep from a neutral to a bright timbre.
With the knob set fully counterclockwise, all frequencies pass through the filter, resulting in a warm, neutral sound.
Starting at 9 o'clock, the signal will get noticeably brighter.
At 12 o'clock, most of the bass frequencies will be cut, resulting in a shiny sound.
All the way clockwise, only the highest overtones remain.
Cutoff CV#
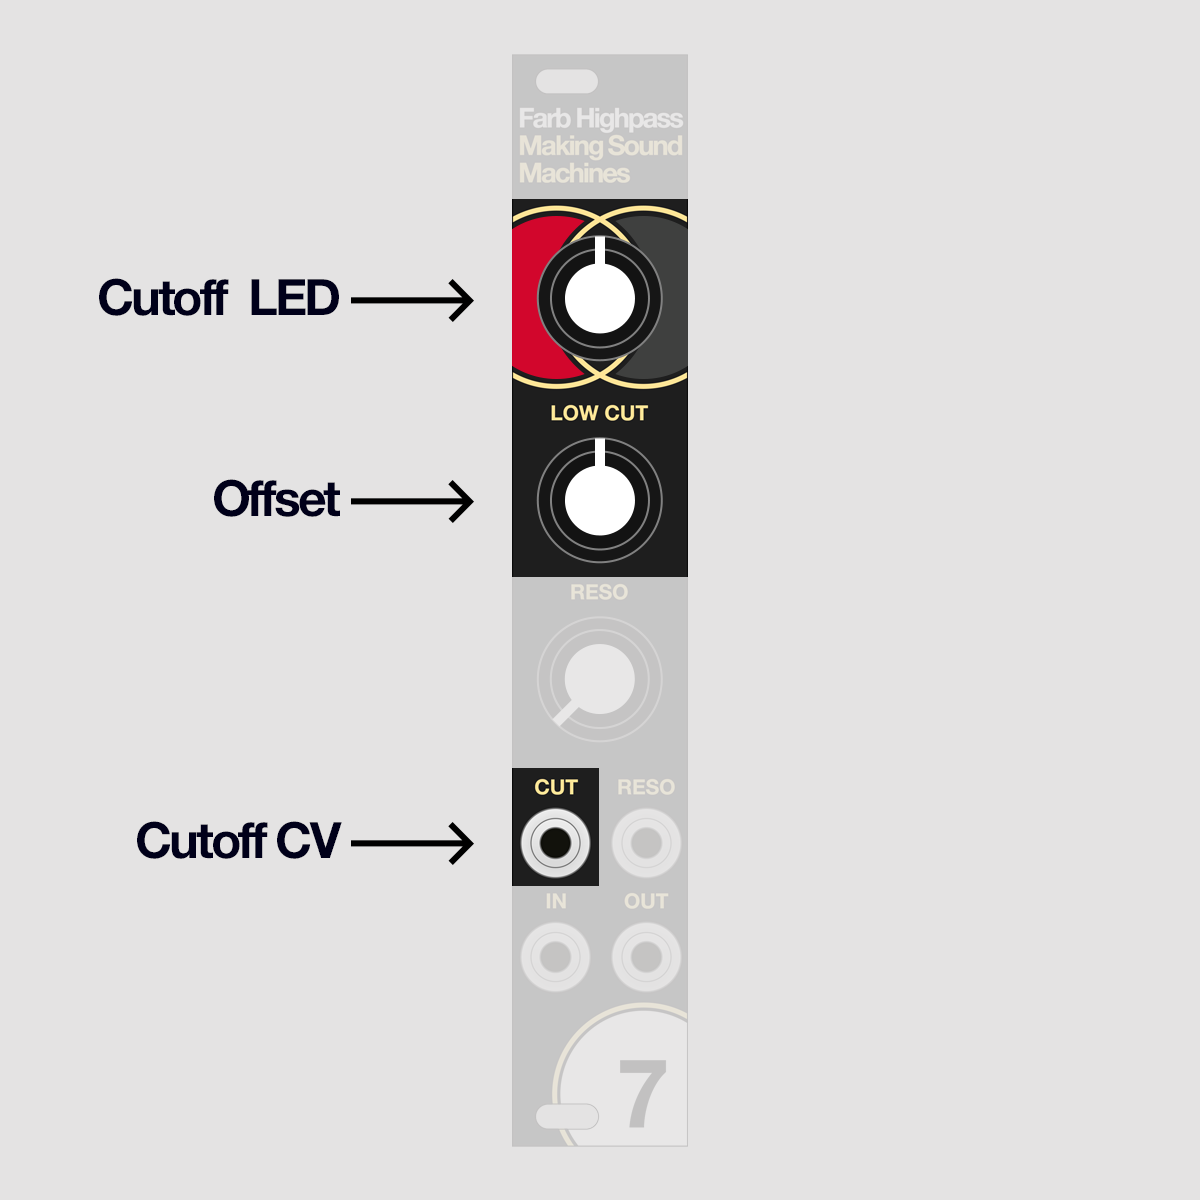
Cutoff comes with a CV input (top left jack).
If a signal is present here, the Cutoff potentiometer becomes an offset for the incoming CV.
The Cutoff input accepts a 10V range: 0V - 10V when the knob is set fully counterclockwise, to -10V - 0V when it is set fully clockwise.
The blue trim potentiometer sandwiched between front panel and circuit board, on the left hand side above the cutoff jack lets you adjust the combined voltage range of knob and CV.
Resonance#
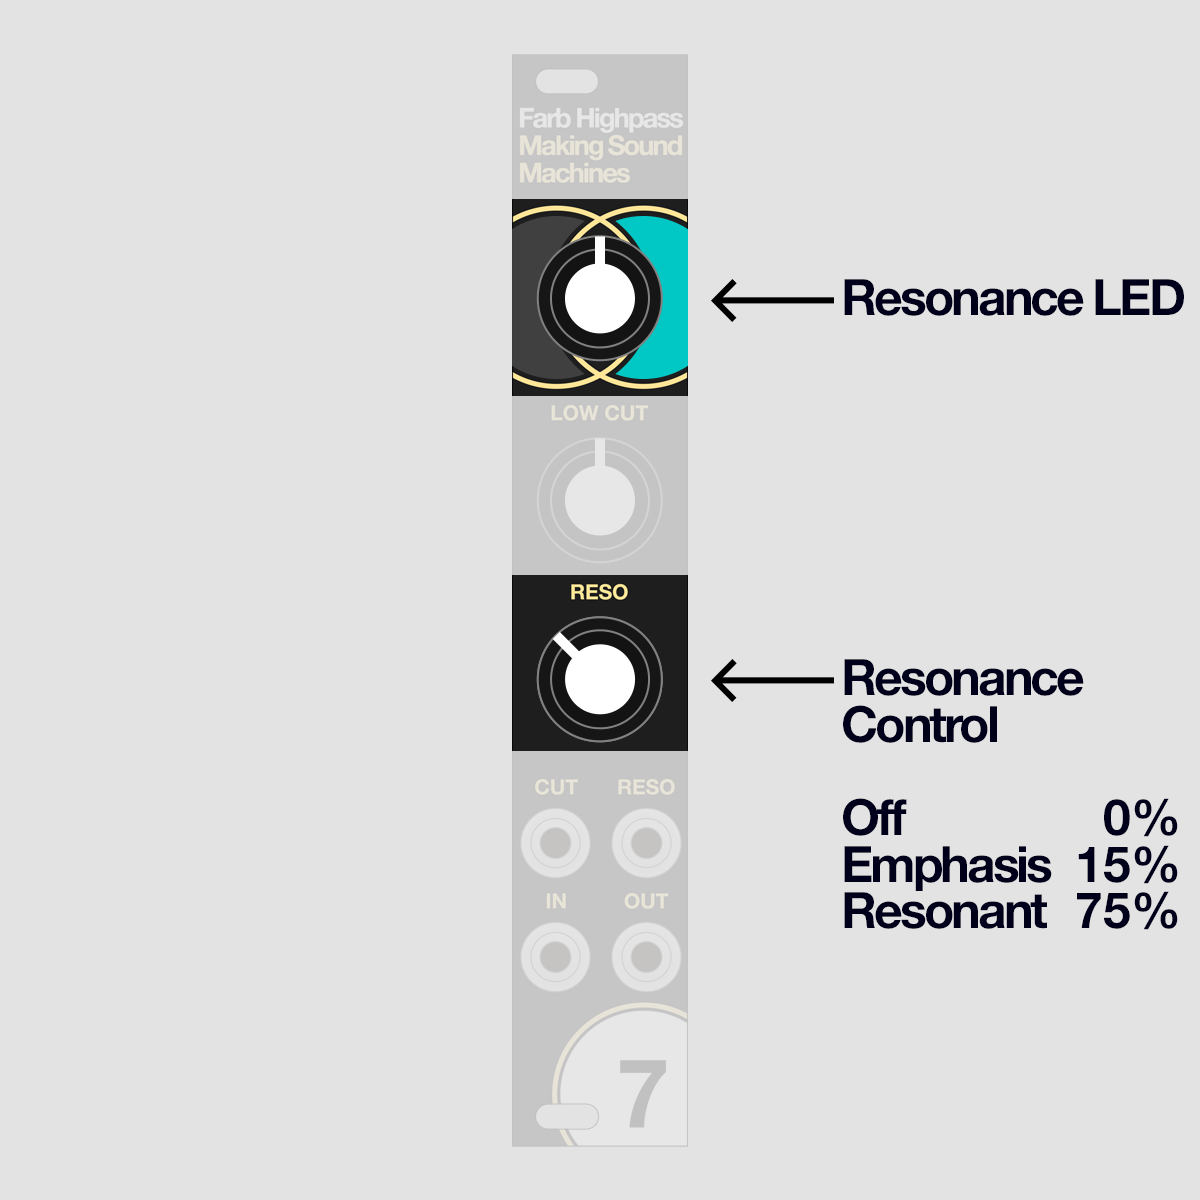
Turn the Resonance knob to increase the intensity of the emphasis at the cutoff frequency.
With the knob set fully counterclockwise, Resonance is off.
Starting at about 9 o'clock, you will notice an increasing emphasis at the cutoff frequency.
With the knob set to about 2 o’clock, the filter will begin to self resonate.
Resonance CV#
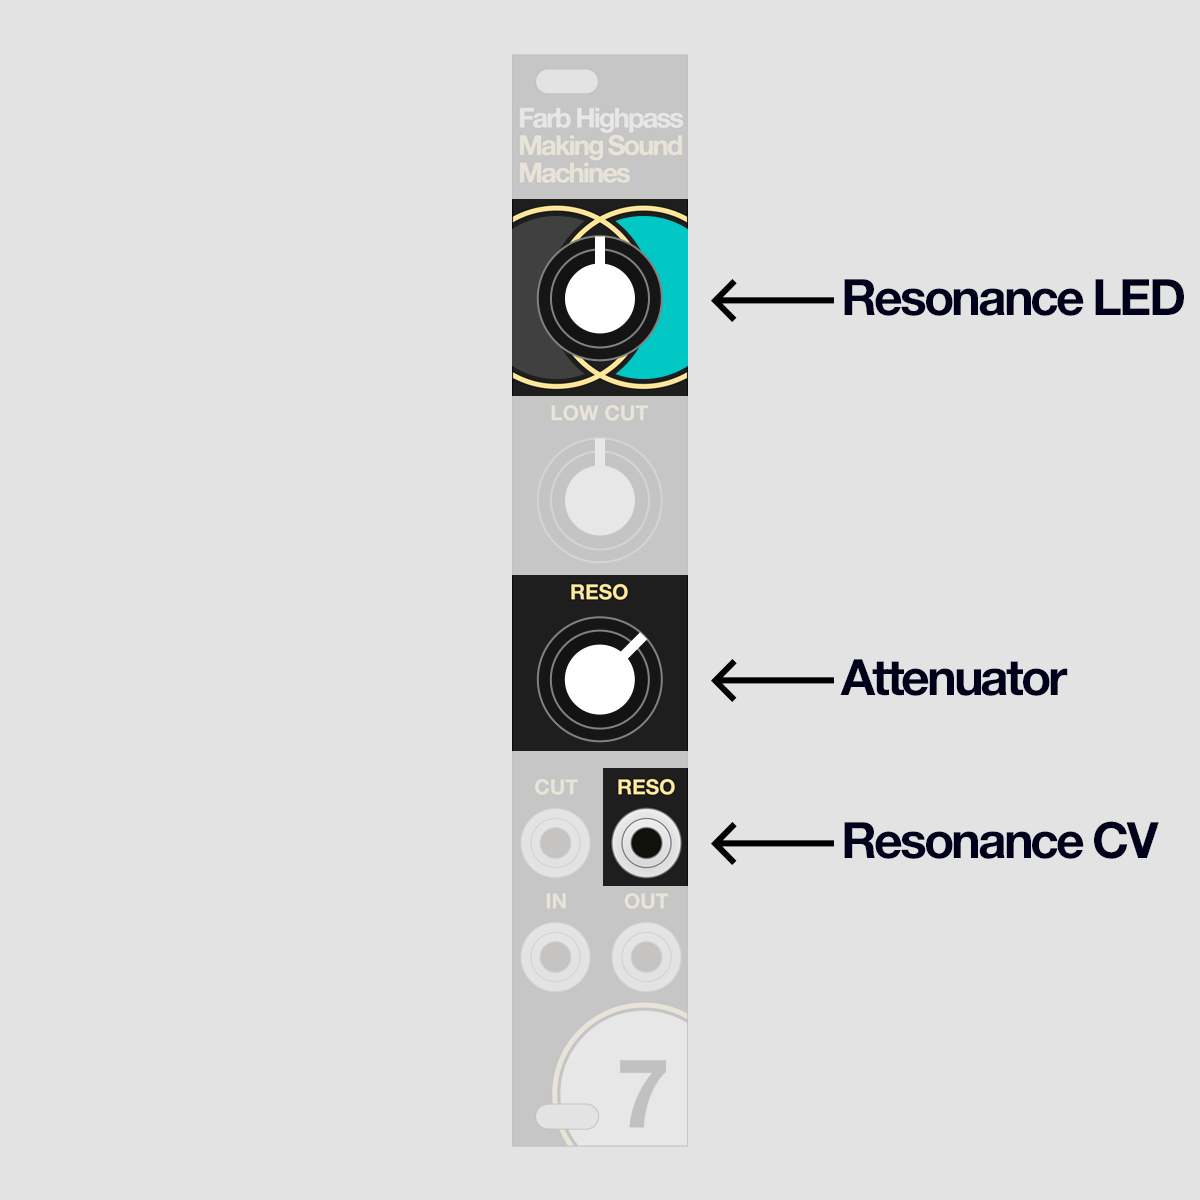
Resonance comes with a CV input (top right jack), a feature not commonly present on transistor ladder filters, allowing for new modulation capabilities in this context.
If a signal is present here, the Resonance potentiometer becomes an input attenuator.
Patch an envelope or LFO into this input to produce vividly animated timbre changes.
The Resonance input accepts a 0V - 10V range.
Getting Started
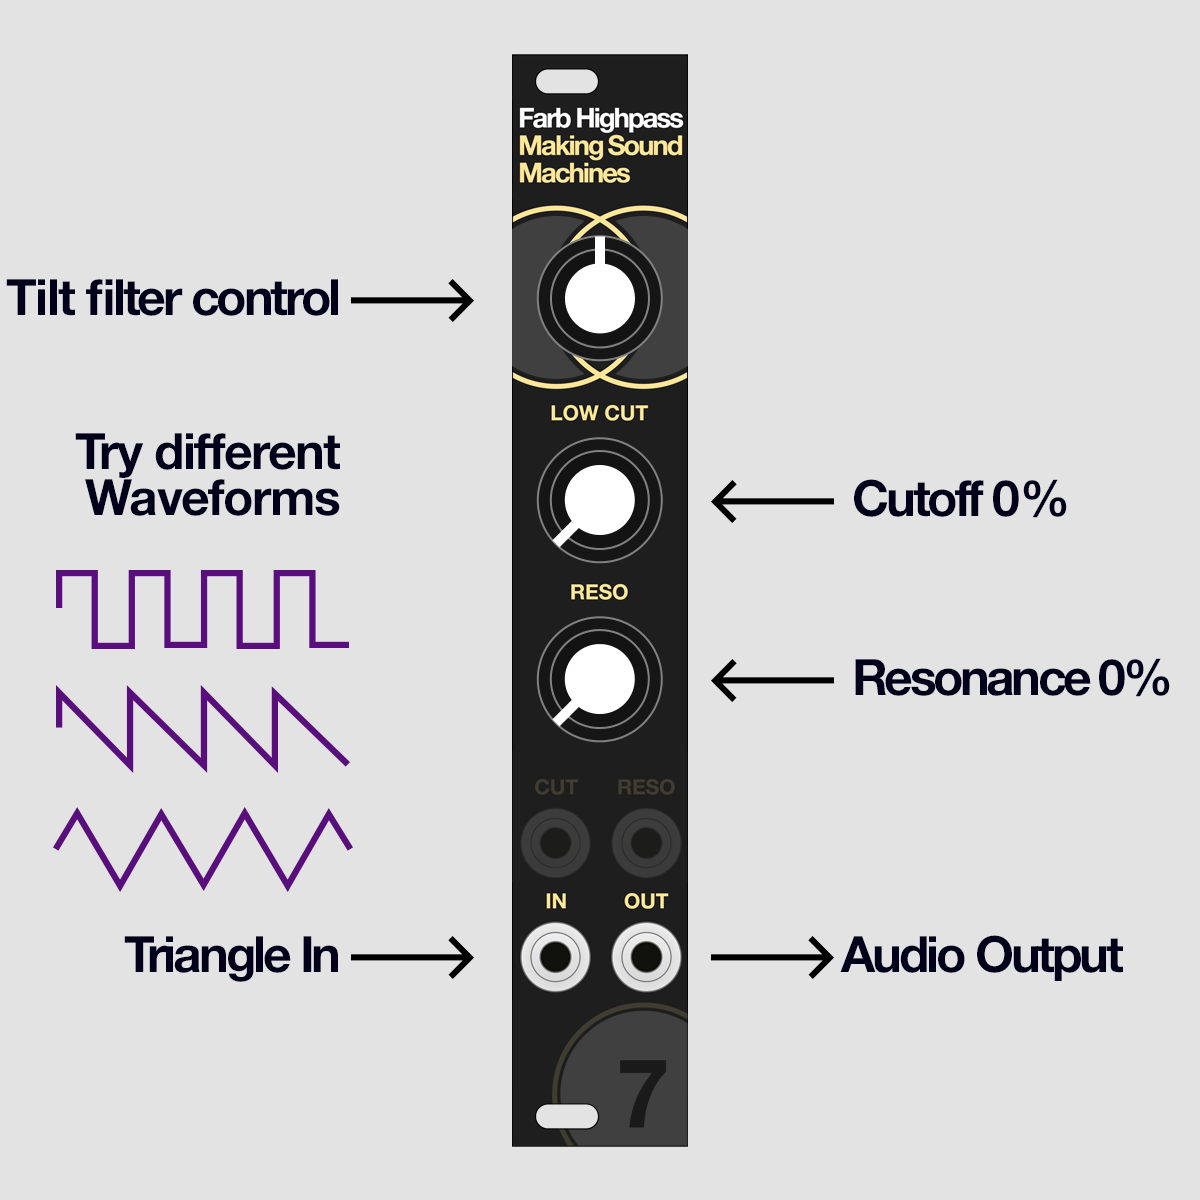
Set Tilt to 12 o'clock, and Cutoff and turn Resonance down (fully counterclockwise).
Patch a triangle oscillator at around C2 (65.4 Hz) into the Audio In.
Sweep the Cutoff. At this setting, you should get the typical filter sweep a transistor ladder highpass is known for.
Try different waveforms as an input signal. For waveforms with hard edges (Sawtooth, Pulse), some high frequency signal will remain even with the Cutoff set fully clockwise.
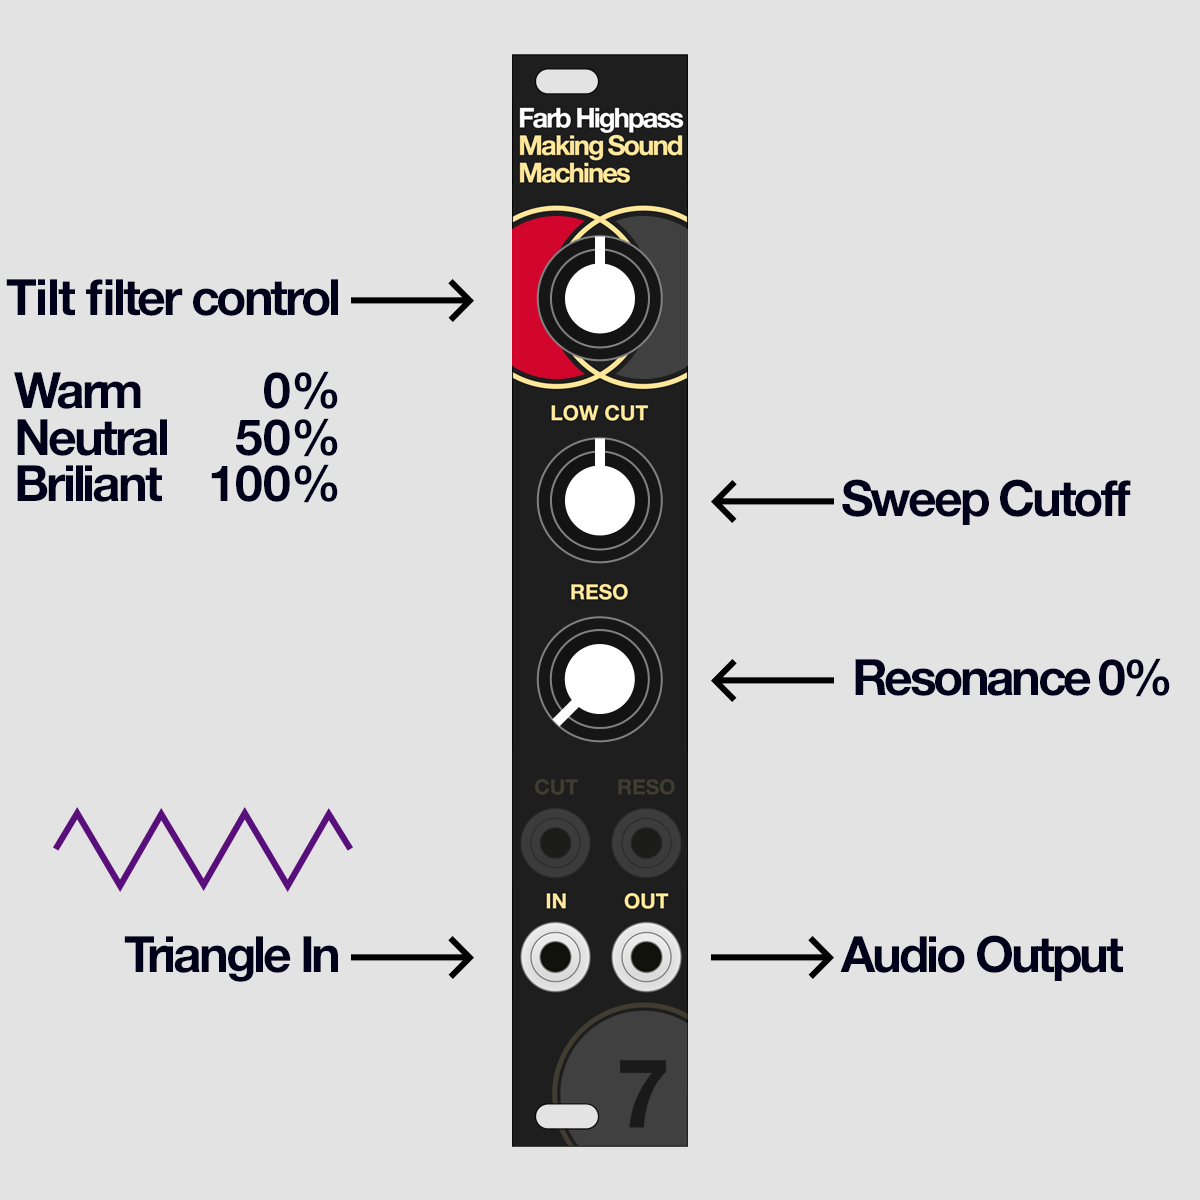
Adjust the Tilt knob to get a feeling for the way frequency bias influences the signal.
Turn the knob counterclockwise to gradually add warmth by emphasizing the bass frequencies, giving the highpassed signal a thick and round sound.
Turn the knob clockwise to gradually add brightness, boosting the treble frequencies. This will emphasize the highpass, giving the signal a sizzling character.
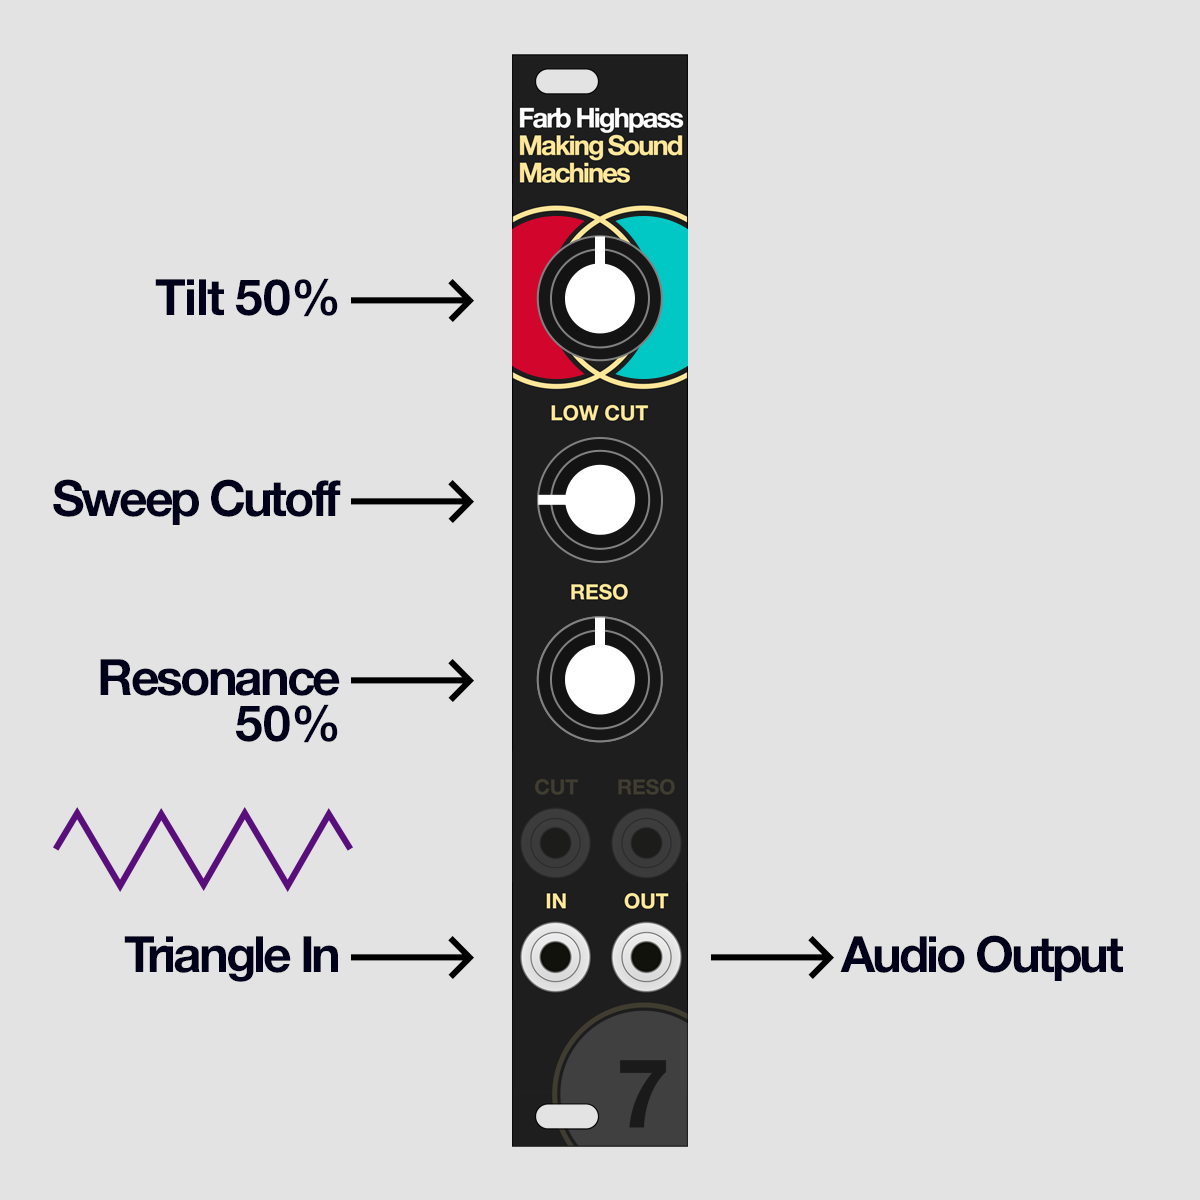
Set Tilt to 12 o'clock, and turn Cutoff down (fully counterclockwise). Bring in resonance at about 12 o'clock and sweep the Cutoff.
You will notice an emphasis around the cutoff frequency, a staple of subtractive synthesis.
Be mindful of the volume at which you are listening, the resonance will get more pronounced the higher you set the Cutoff.
Try with different Tilt settings and note how you can amplify or attenuate the resonance emphasis depending on the cutoff setting.
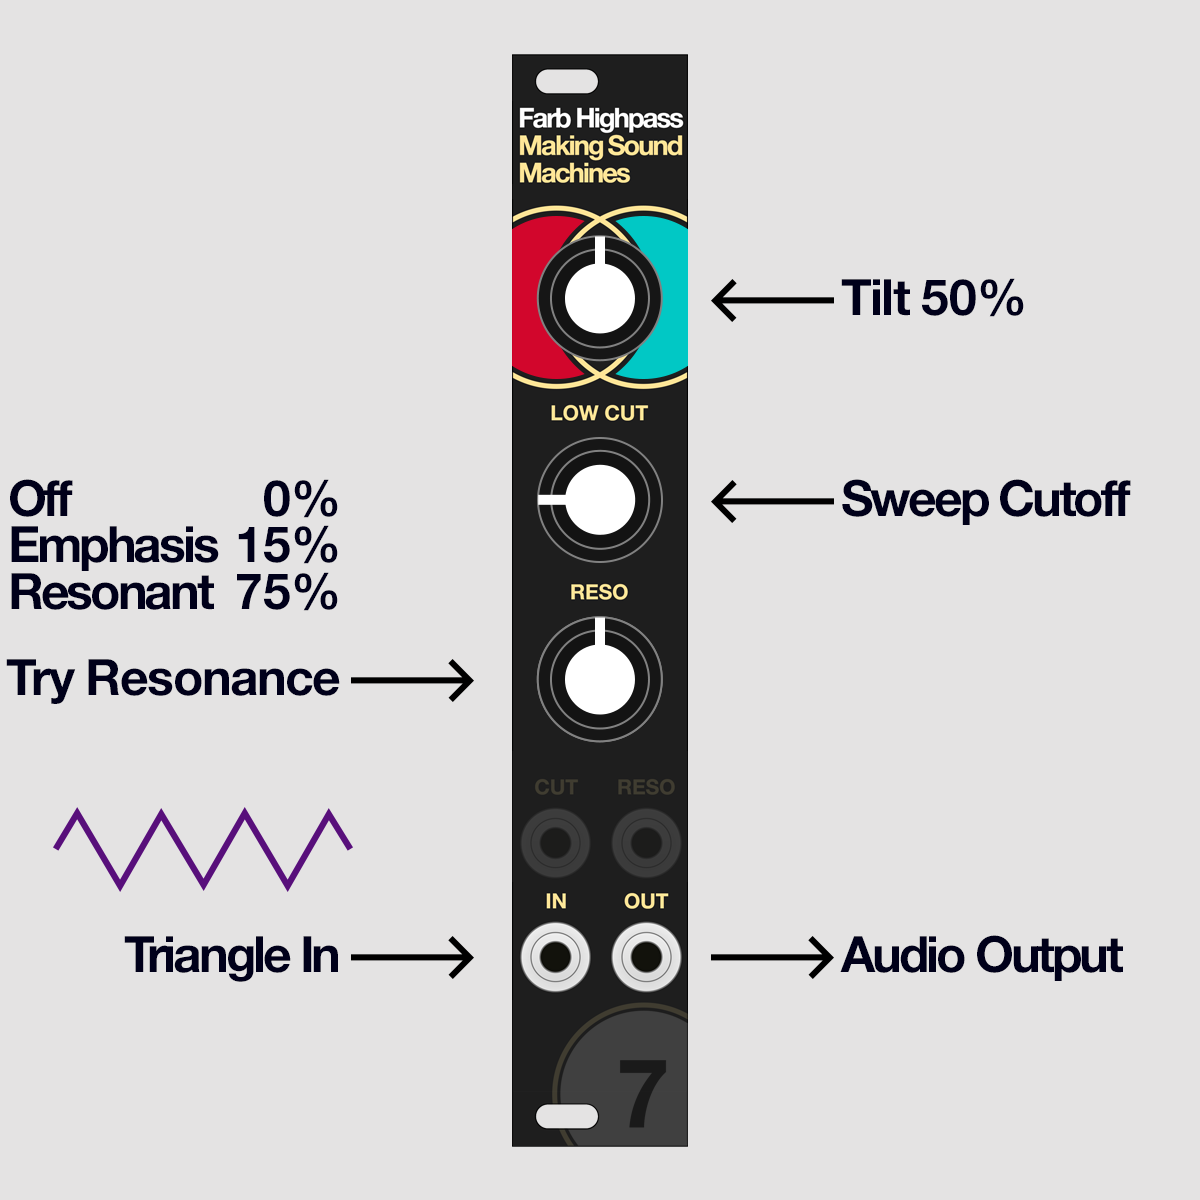
Adjust the Resonance knob and sweep the Cutoff to get a feeling for the way Resonance changes the filter response. At 12 o'clock you get a noticeable emphasis around the cutoff frequency.
Starting at 2 o'clock, the circuit will start to self-resonate.
At 3 o'clock, the circuit will fully ring and start to suppress the input signal, resulting in a changing overtone structure of the filter.
Above 3 o'clock, depending on the Cutoff setting, the resonance becomes unstable, adding a brittle timbre.
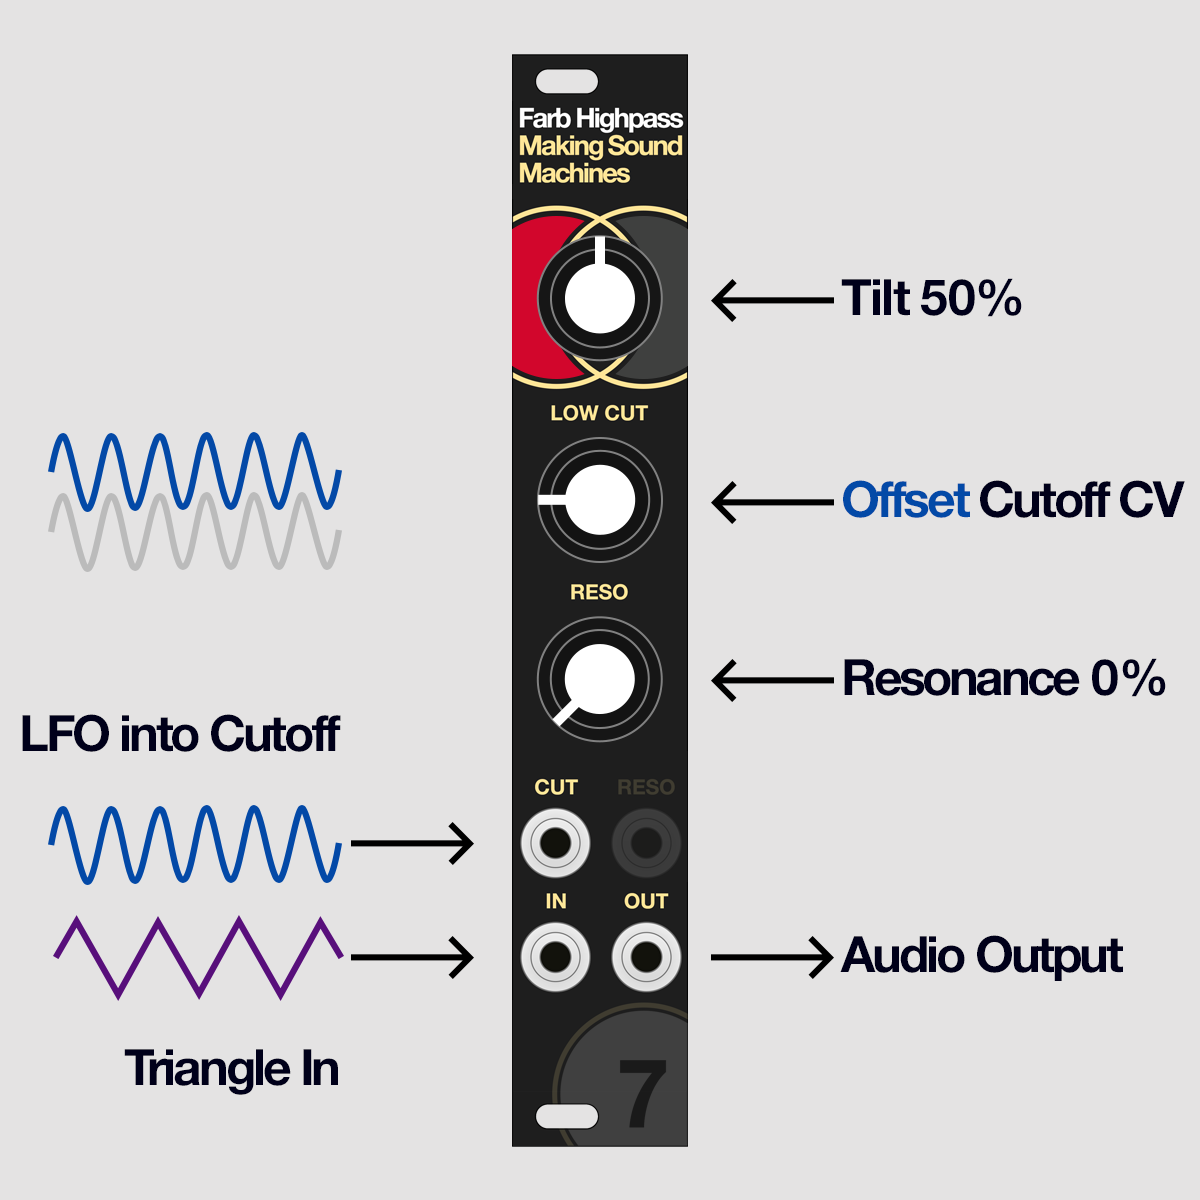
Patch an LFO into Cutoff CV.
The Cutoff knob will act as an offset. Imagine this as setting a baseline for the modulation using the knob, with the CV from the Cutoff input added on top.
This is a great point to patch a synth voice’s envelope to alter the timbre alongside the shape of the amplitude.
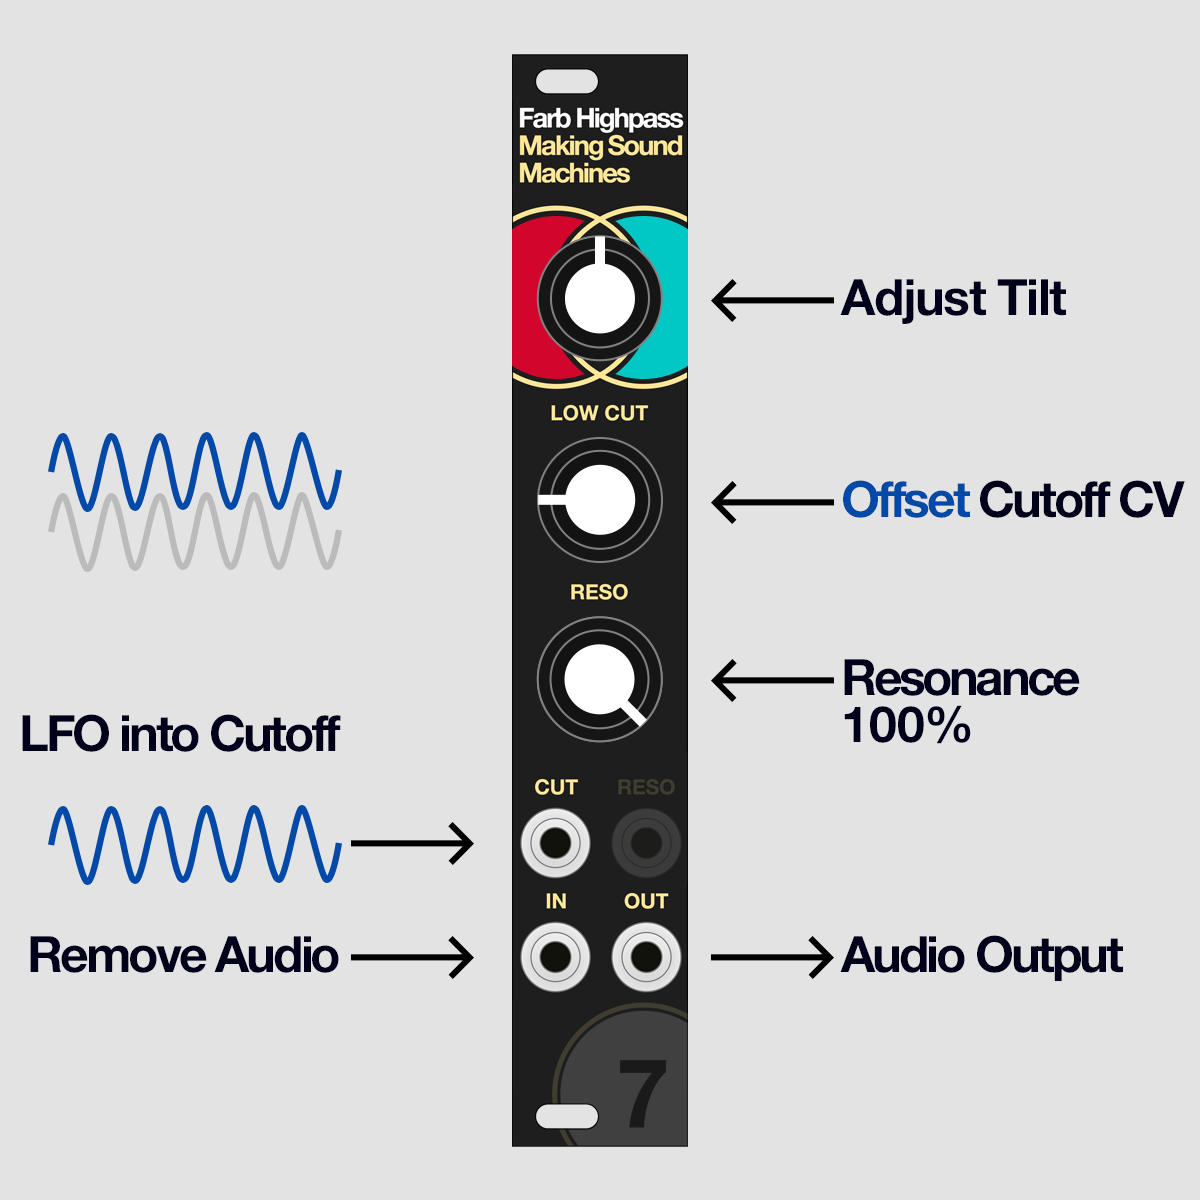
Turn up the Resonance knob all the way clockwise. Remove the signal patched to the input and you can play the resonance only.
Adjust the Tilt knob to adjust the timbre.
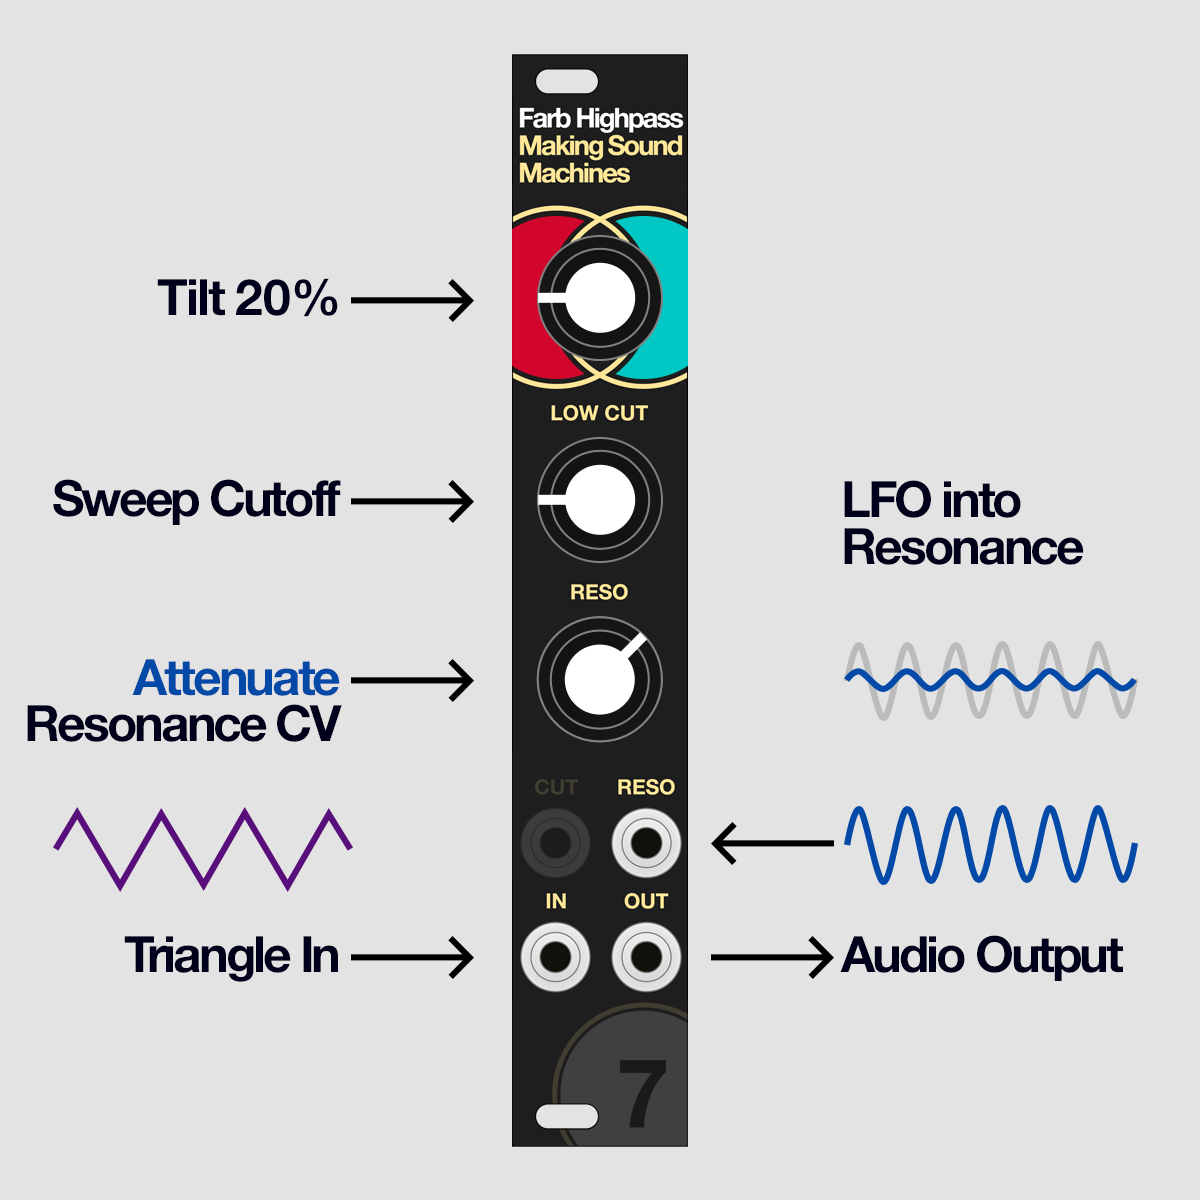
Unpatch Cutoff CV, patch the Sawtooth Oscillator back into Audio In. Set Tilt and Cutoff to 9 o’clock.
Feed a slow LFO into Resonance CV. Scale the incoming CV by turning the Resonance knob.
Experiment by sweeping Cutoff, and adjust Tilt to your taste.
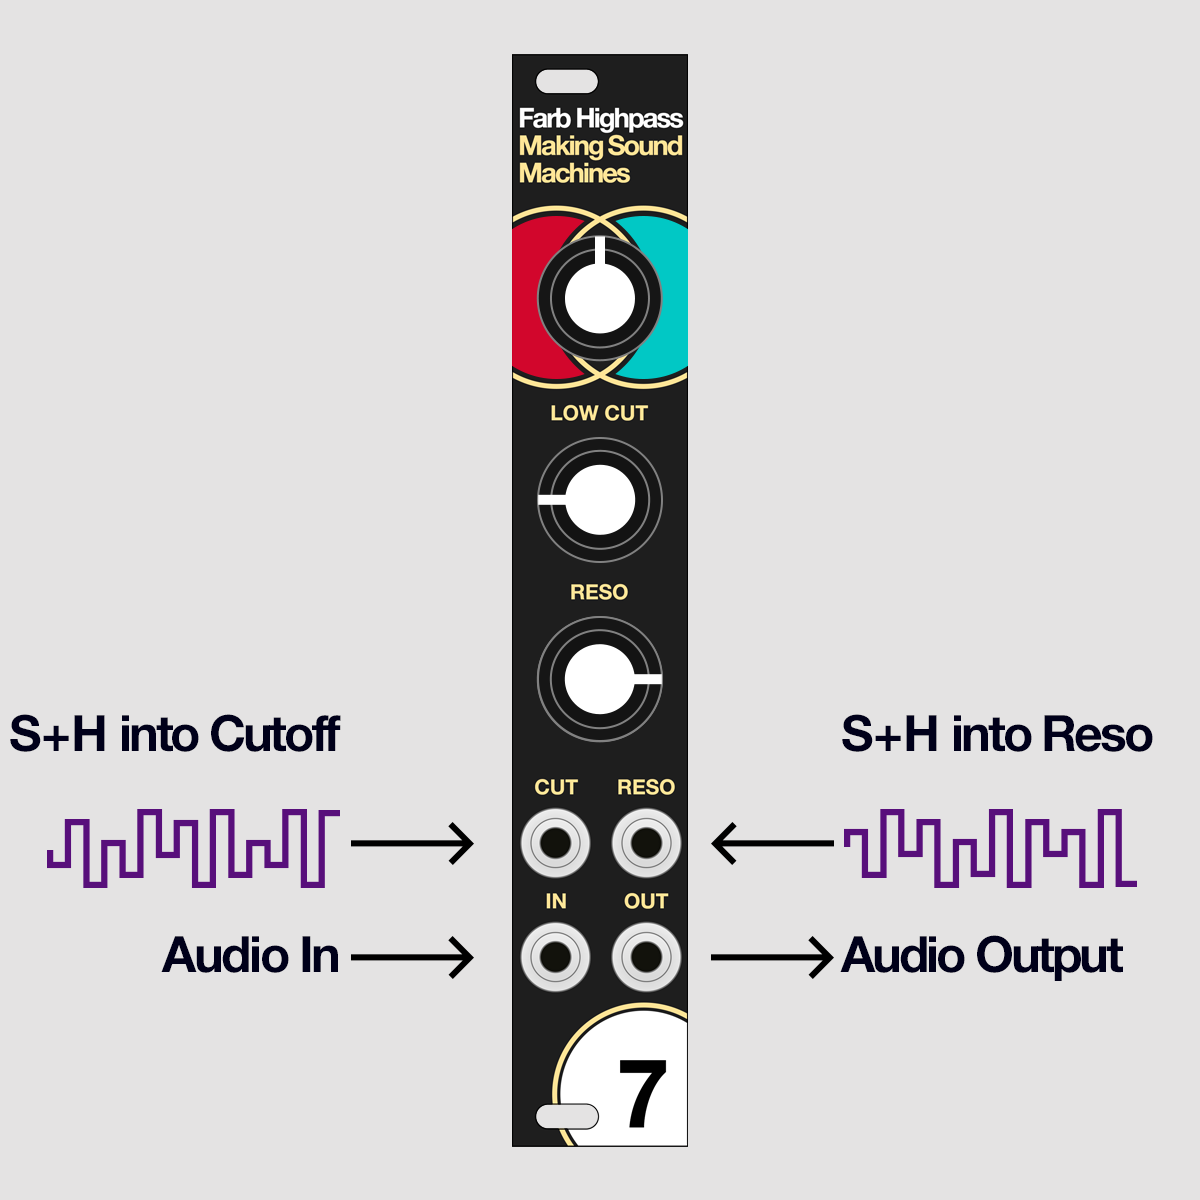
Finally patch a Sample and Hold into Cutoff CV and Resonance CV at the same time. Adjust Tilt to your taste.
You will get lively, constantly evolving timbres.
If you own two Farb Highpass modules, or double track the same signal with a recording setup, this will make for a smashing stereo effect.
Explore#
We hope this short tutorial section has inspired you to start experimenting with your own settings and sonic material. Acoustic sounds and drum loops are an equally fascinating jumping off point to process with this module.
Enjoy Farb Highpassing - and if you make something you like, do not hesitate to share the results!
Thank you#
Thank you for your time, enthusiasm and care, sharing insights and advice.
Stijn and Priscilla – TiNRS This is Not Rocket Science Lauri – Vaski Embedded Manu – Befaco Ben – DivKid
The DIY community and the shops propelling synth DIY forward.
Steve, Will and Will – Thonk Manuel and Hagen – Exploding Shed Daniel and Madeleine – Mülheim Modular Joe Proswell – dsp.coffee
