Farbshaper – Manual
Classic West Coast Analog Waveshaper with dual staging
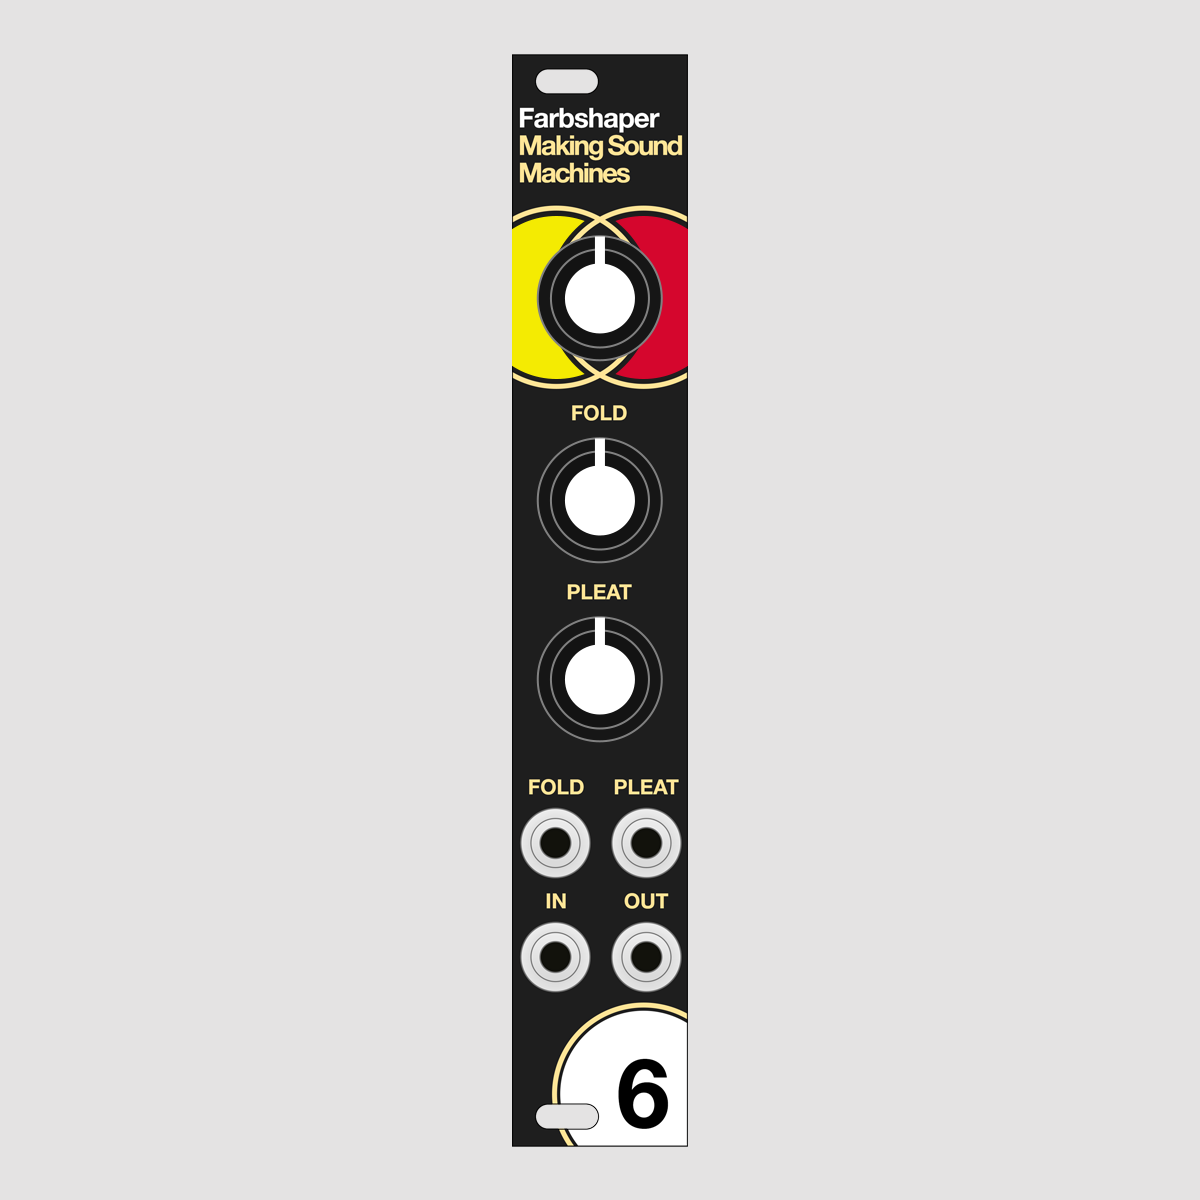
Farbshaper is a classic West Coast analog waveshaper for Eurorack, designed to shape the overtones of an audio signal with two voltage controlled stages.
We have always been fascinated with analogue effects circuits, and we love the way their quirks and nonlinearities inspire us to find new sounds.
Farbshaper is based on a classic circuit that turns a ramp into a sine, and was historically used in function generators and oscillators. On any other signal it will add one or multiple wave folds.
The circuit produces opposite offsets internally, so the knob settings interact strongly and are fun to automate with CV.
This module is excellent to use as a non-linear shaper for acoustic and electronic sounds, ranging from gentle timbral transformation to colourful wavefolding.
It is part of our Farbfilter (colour filter) range of sound colouring modules, offering a wide sonic palette from lending subtle colour to rich timbre bending tones in 4HP.
Quickstart Guide#
You are reading the Farbshaper web manual, which takes an in-depth look at the idea behind the module.
Farbshaper comes with a printed quickstart guide as well. Here you can find the PDF.
Connect to power#
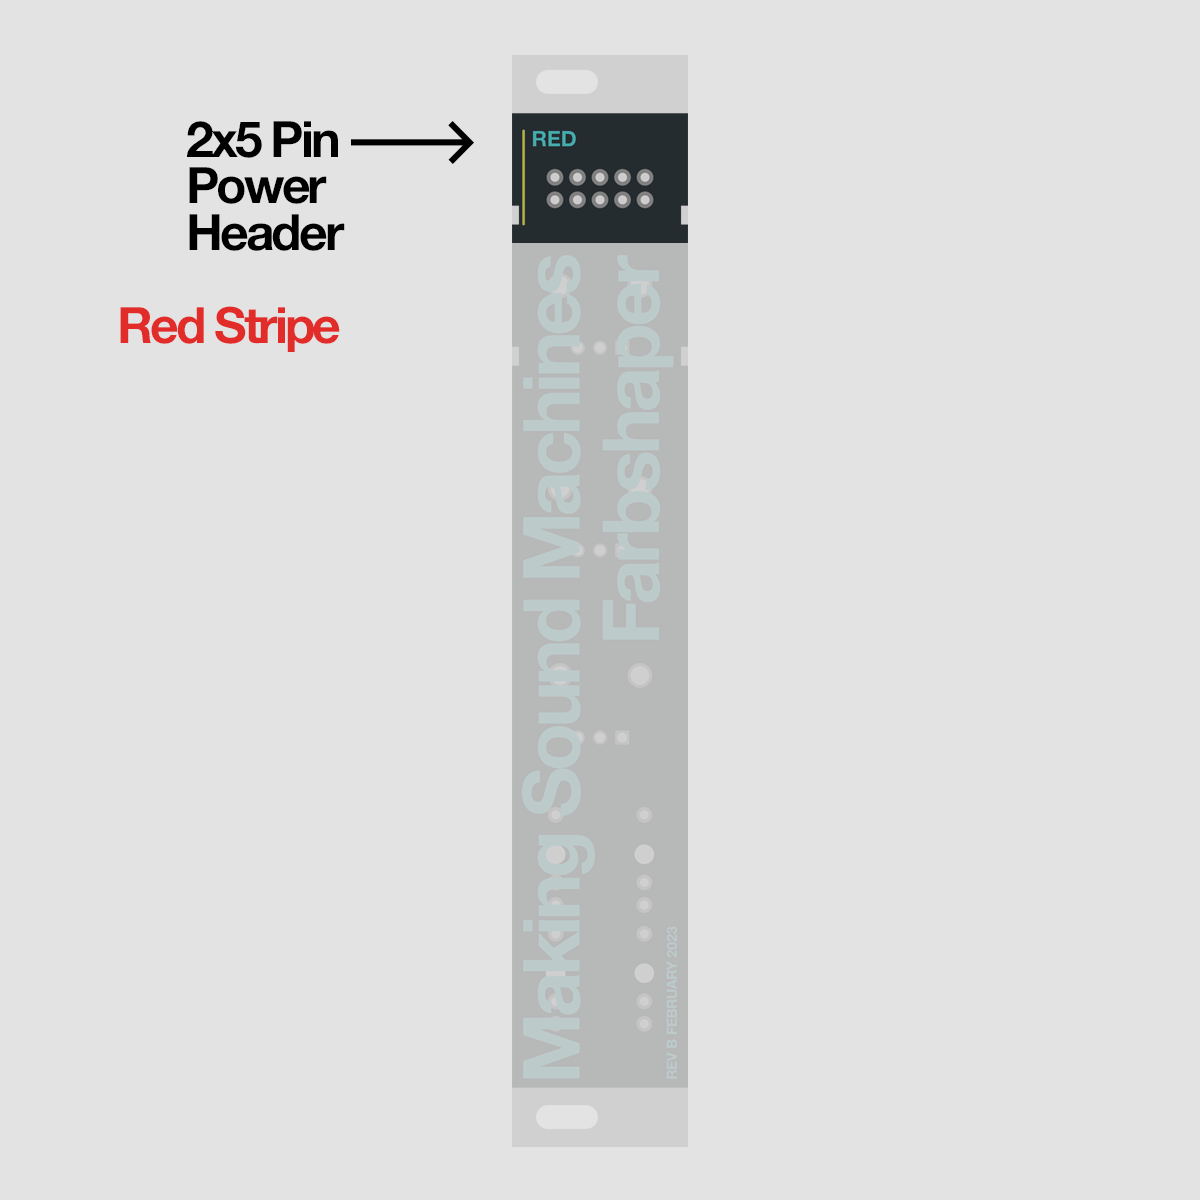
Farbshaper requires a -12V / +12V Eurorack power supply. Connect the 2x5 pin header on the back to the bus board of your Eurorack case using the included ribbon cable.
The red stripe on the ribbon cable needs to match the Red Stripe mark on both Farbshaper and bus board.
The power consumption is: +12V 72 mA / -12V 15 mA
Audio In + Out#
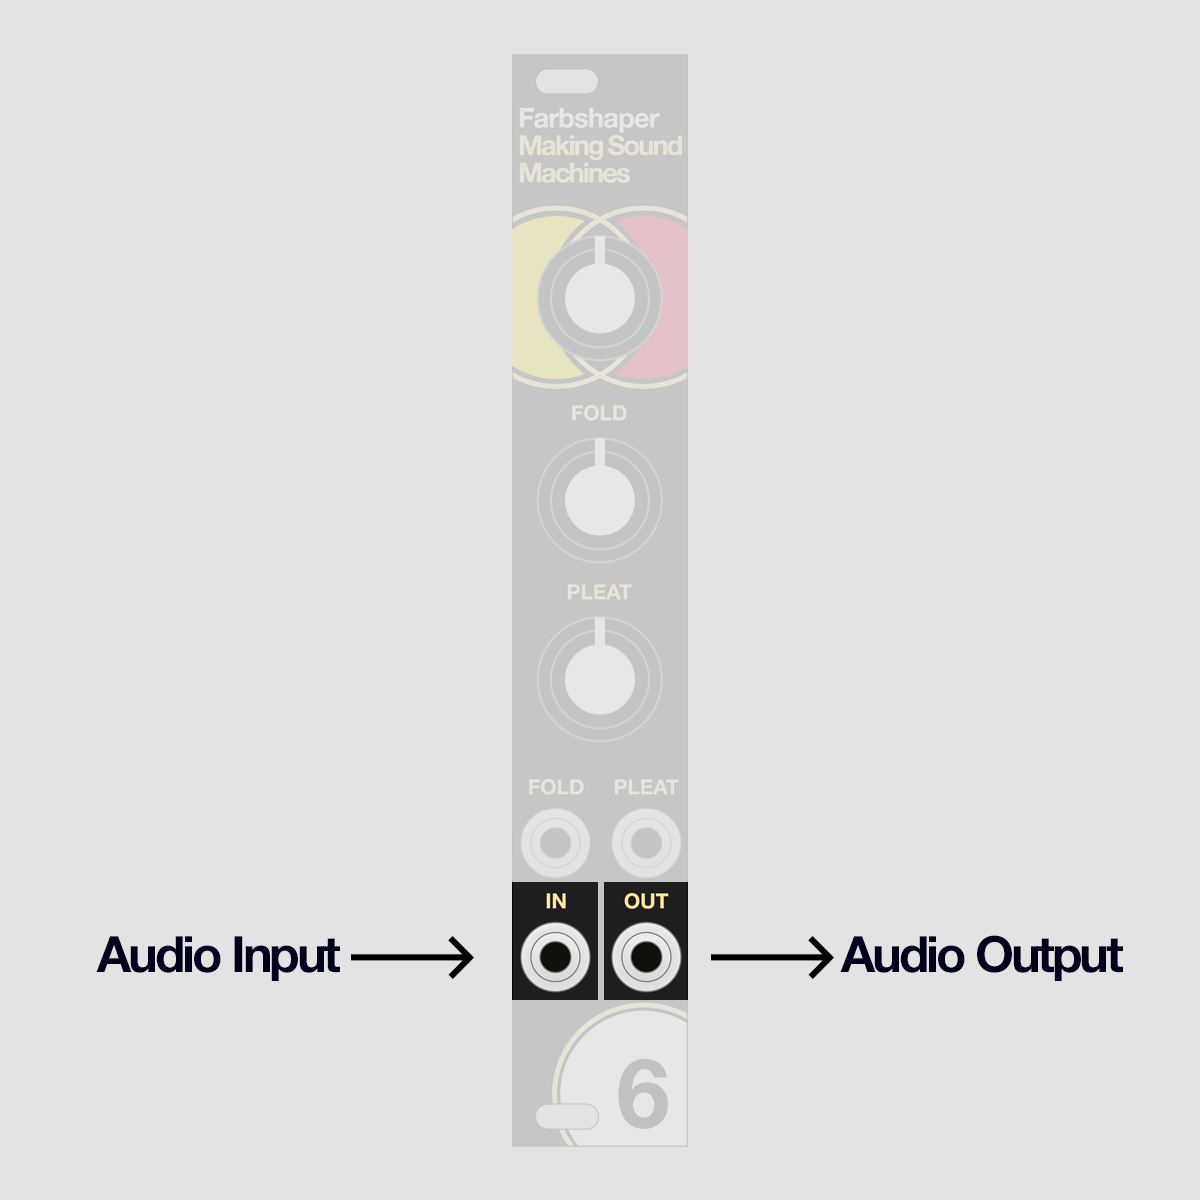
Patch an audio signal into the Audio In jack. You will find it on the bottom left of the module.
The Audio input expects a -5V /+5V range.
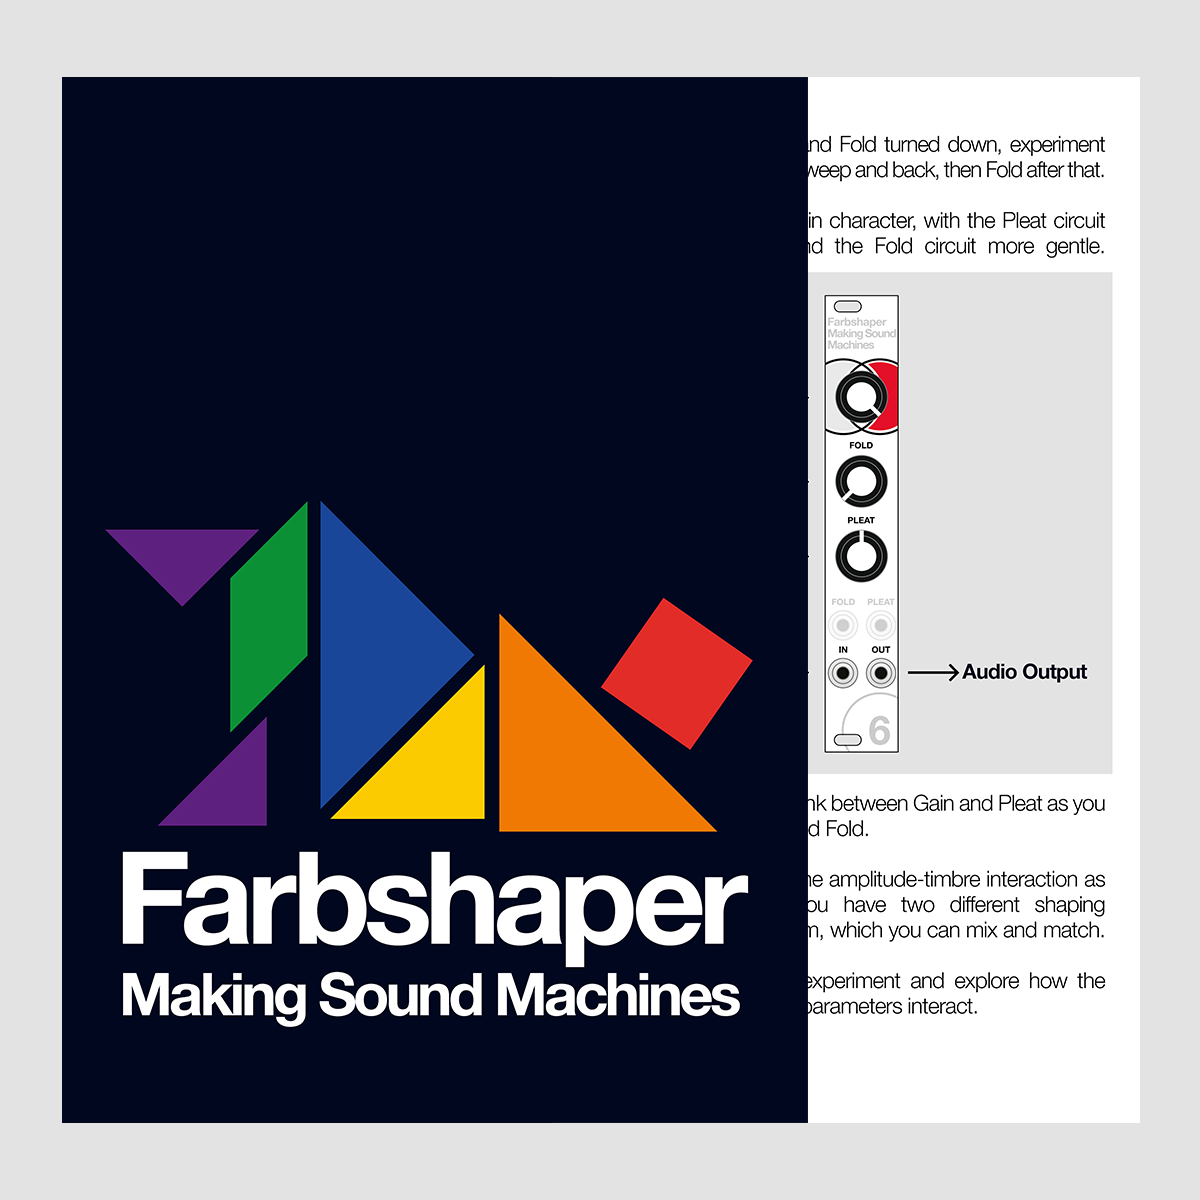
The Audio Out jack, on the bottom right of the module, provides the processed output signal.
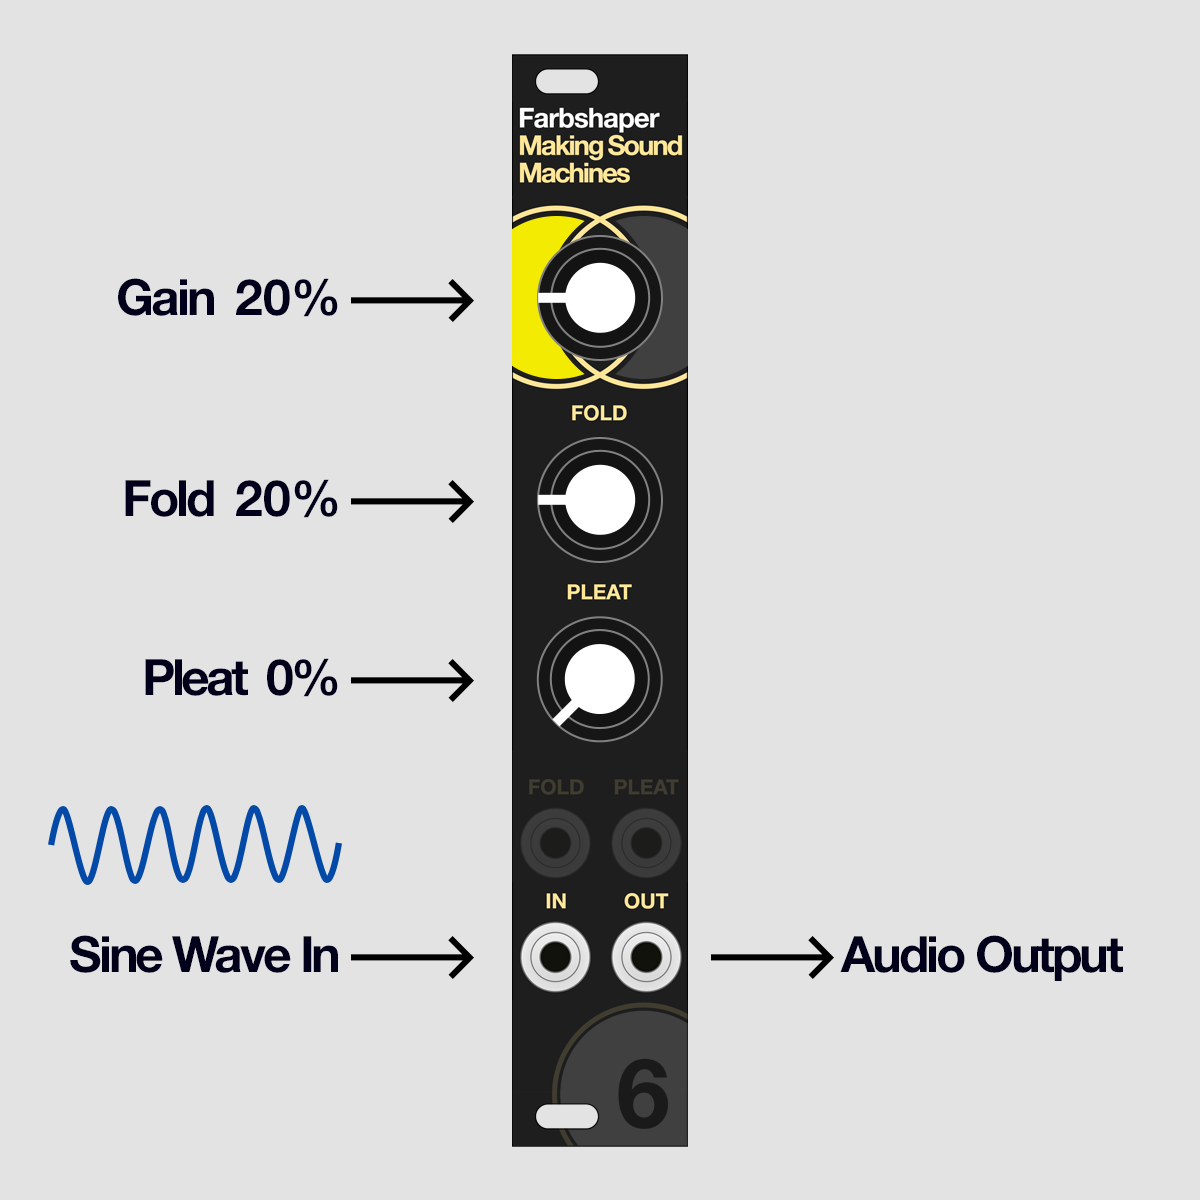
Gain#
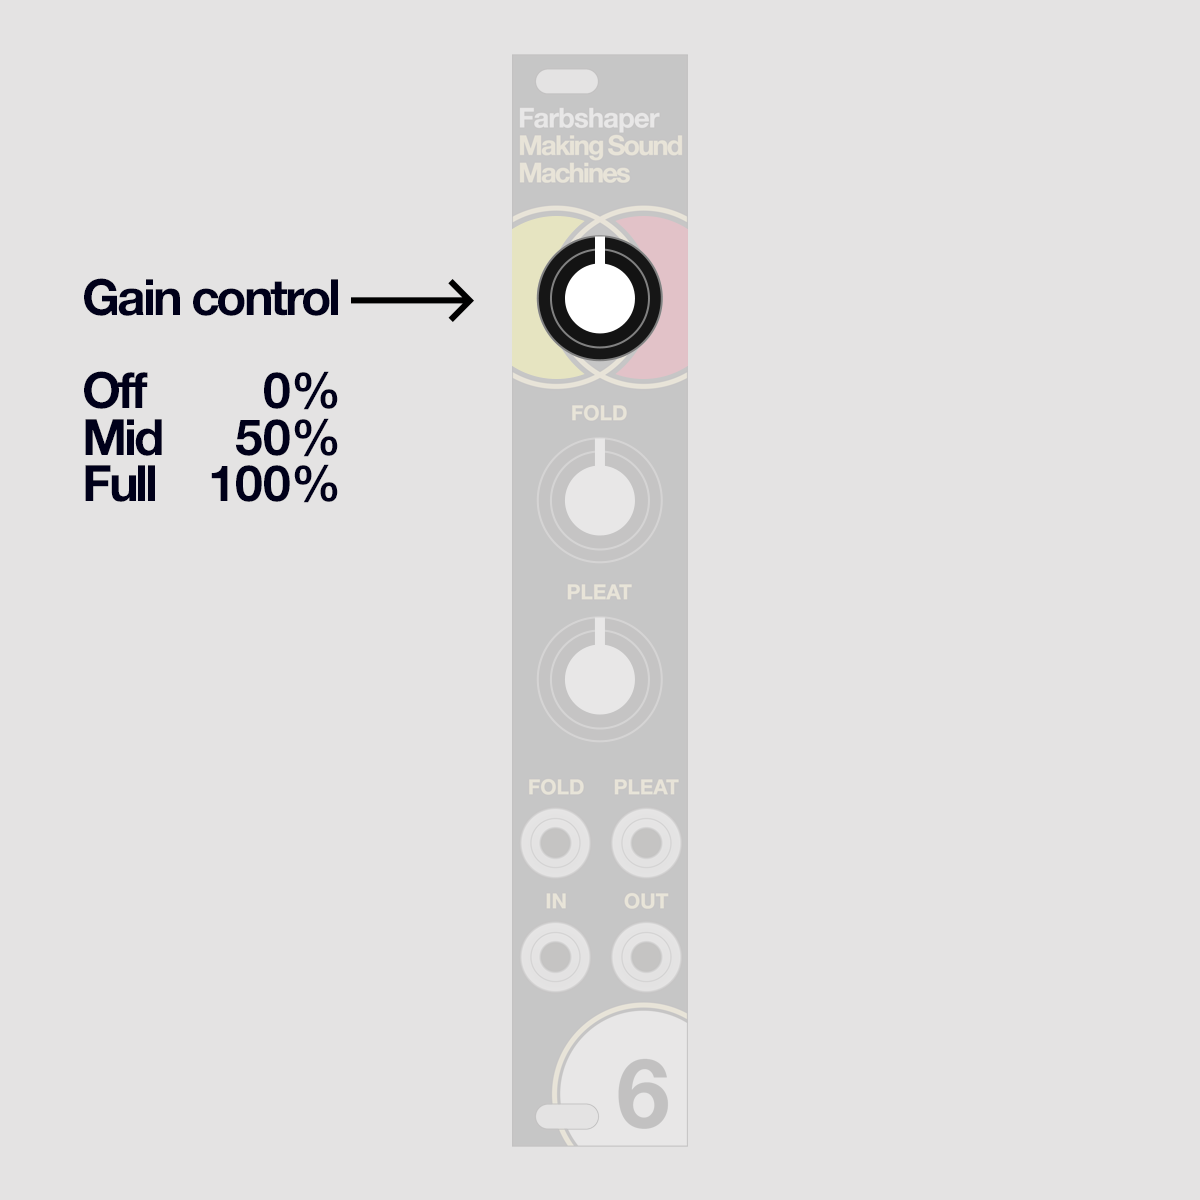
The topmost knob on the module represents a simple input gain circuit.
Turning the knob fully clockwise will pass the full amplitude into the waveshaper. Setting it fully counterclockwise will turn off the Audio Input.
The waveshaping circuit on Farbshaper strongly interacts with the incoming volume of the audio signal you want to process.
Always experiment with the input gain together with the Fold and Pleat setting to fine-tune Farbshaper's processing.
Feed the Audio In from a VCA module, then attenuate with the Gain knob, if you need extra voltage control over this parameter.
Fold#
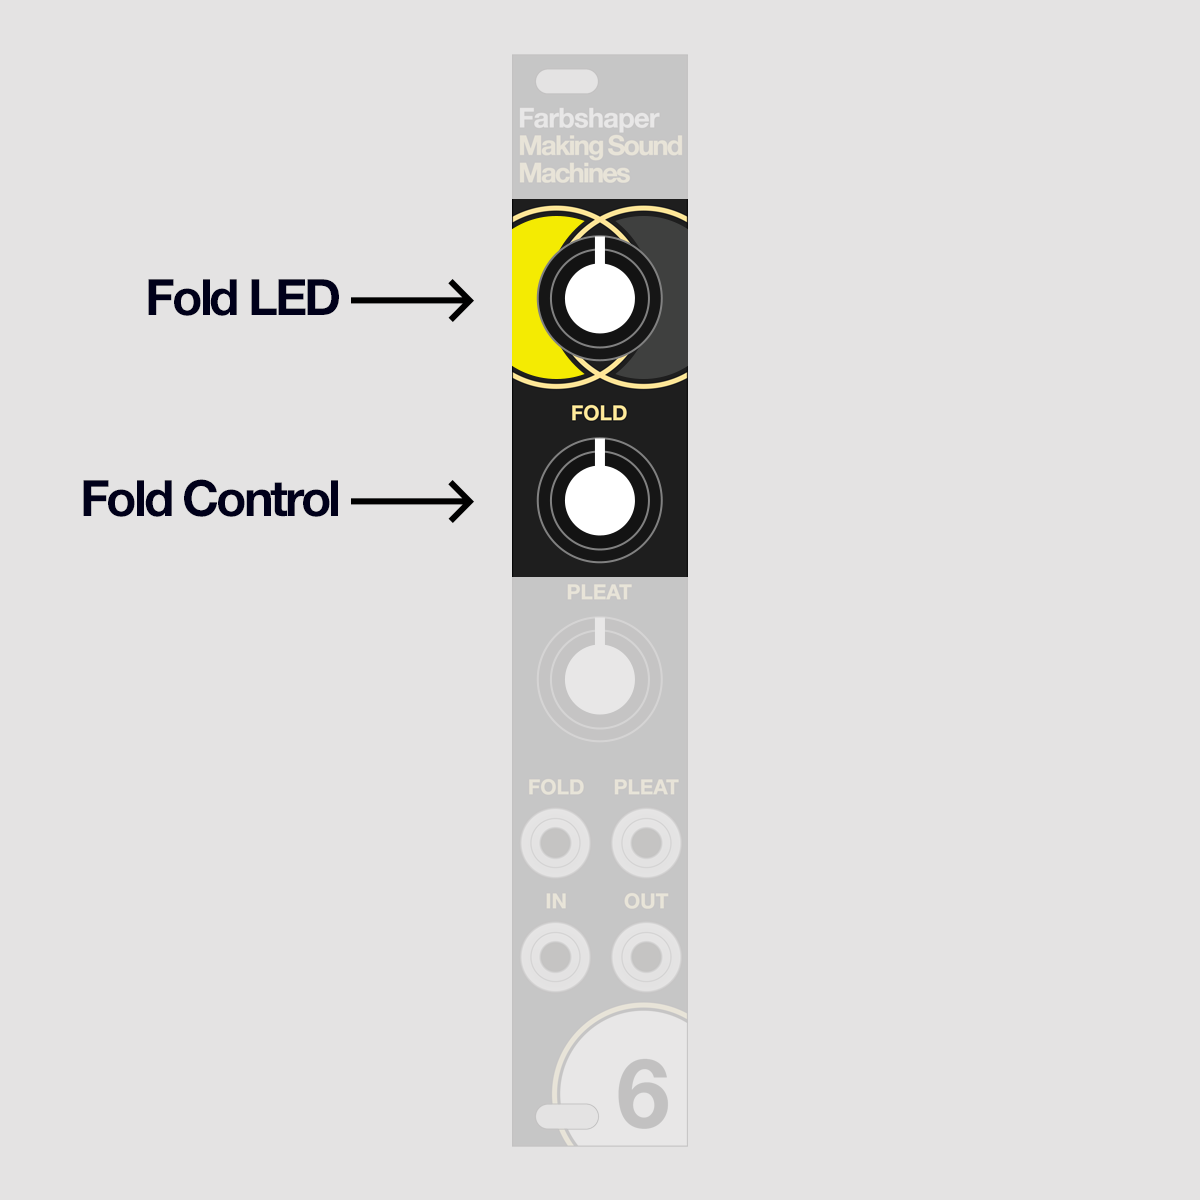
Turn the Fold knob to add a single fold to the incoming signal.
The more you turn the knob clockwise, the more pronounced the effect becomes, adding a bright timbre to the incoming signal.
With Pleat turned down, explore different combinations of input gain and Fold, and how they interact.
Fold CV#
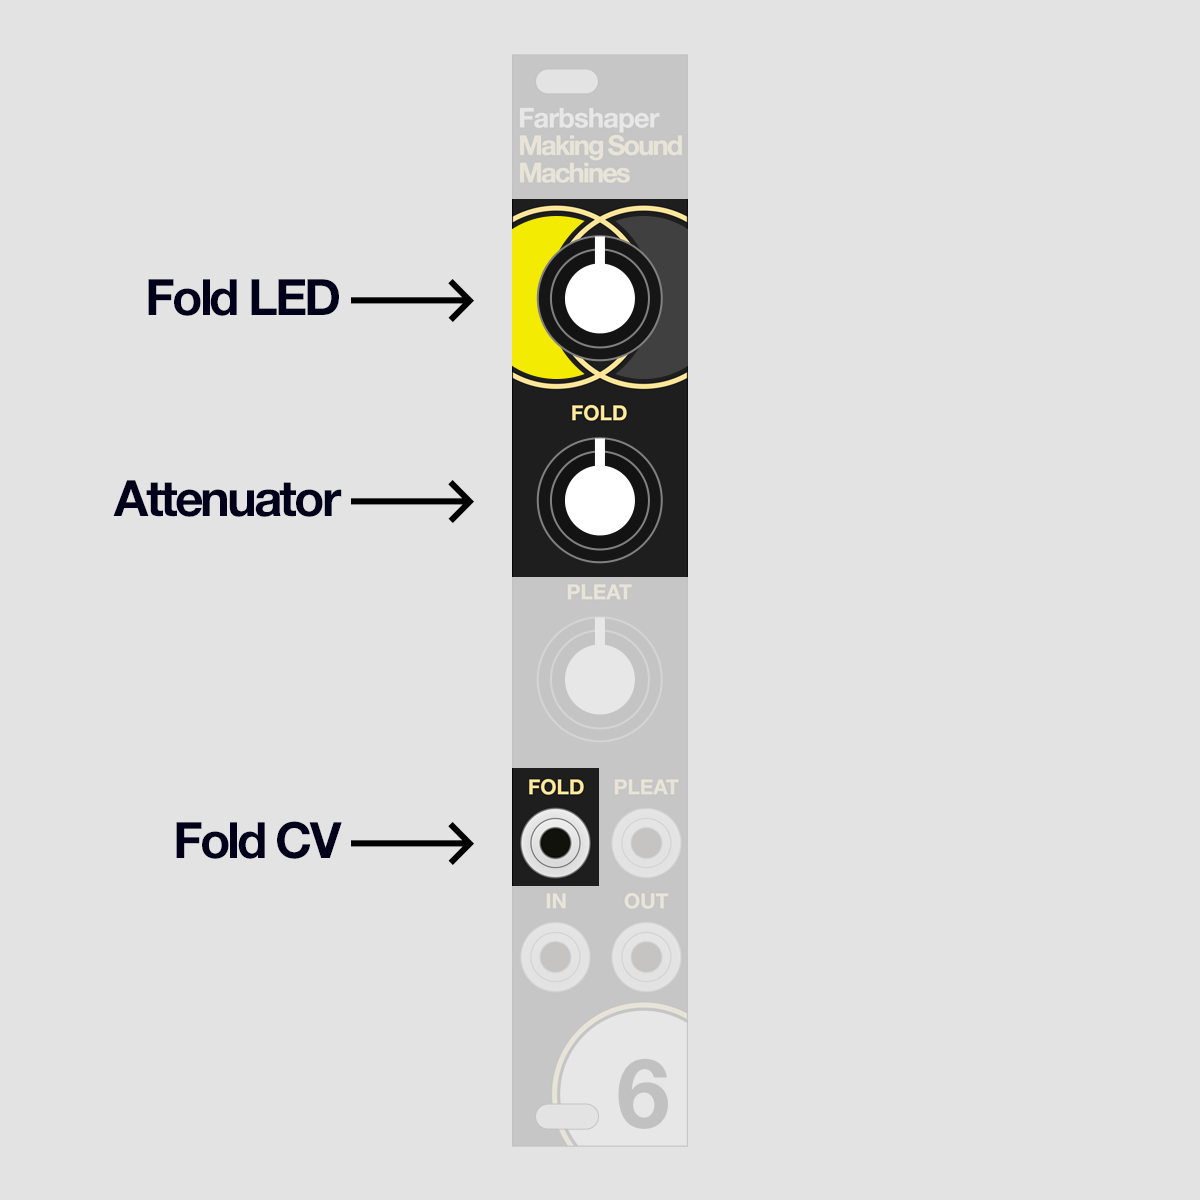
Fold comes with a CV input (top left jack).
If a signal is present here, the Fold knob becomes an input attenuator.
Patch an envelope or LFO into this input to animate timbre changes in the Fold stage.
The Fold input accepts a 0 - 10V range.
Pleat#
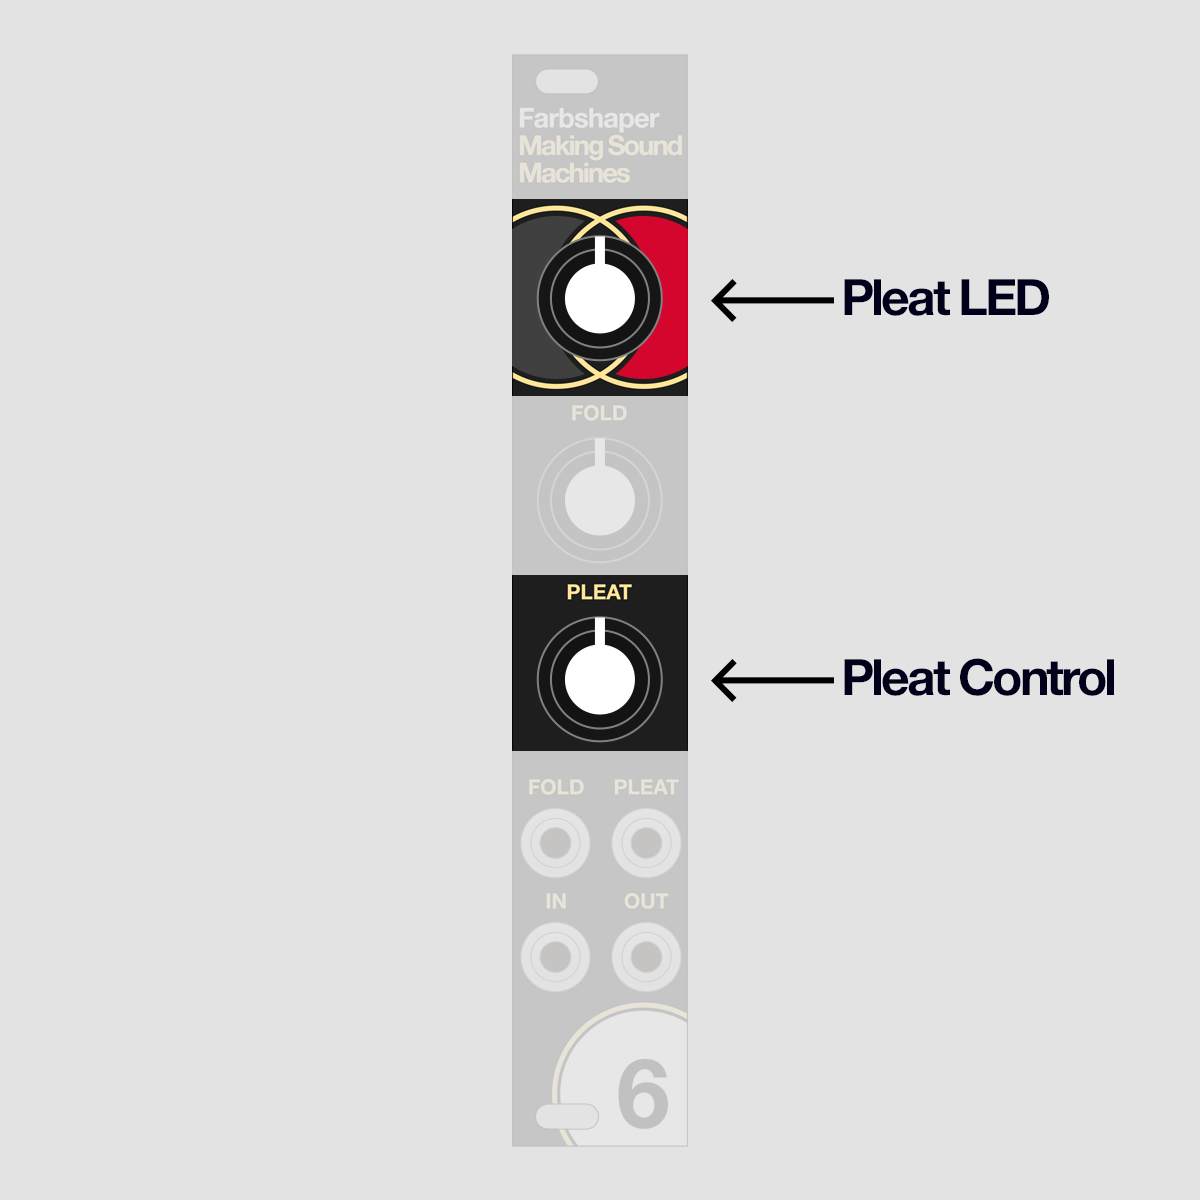
Turn the Pleat knob to add the second waveshaping stage to the incoming signal.
This stage adds multiple additional folds, and strongly interacts with the signal from the Fold stage.
It produces different results depending on the internal offset and timbre passed on from the stage before it.
The more you turn the knob clockwise, the more additional overtones are produced, again adding a brightness to the incoming signal.
Explore the interaction of different settings on each of the 3 knobs.
Pleat CV#
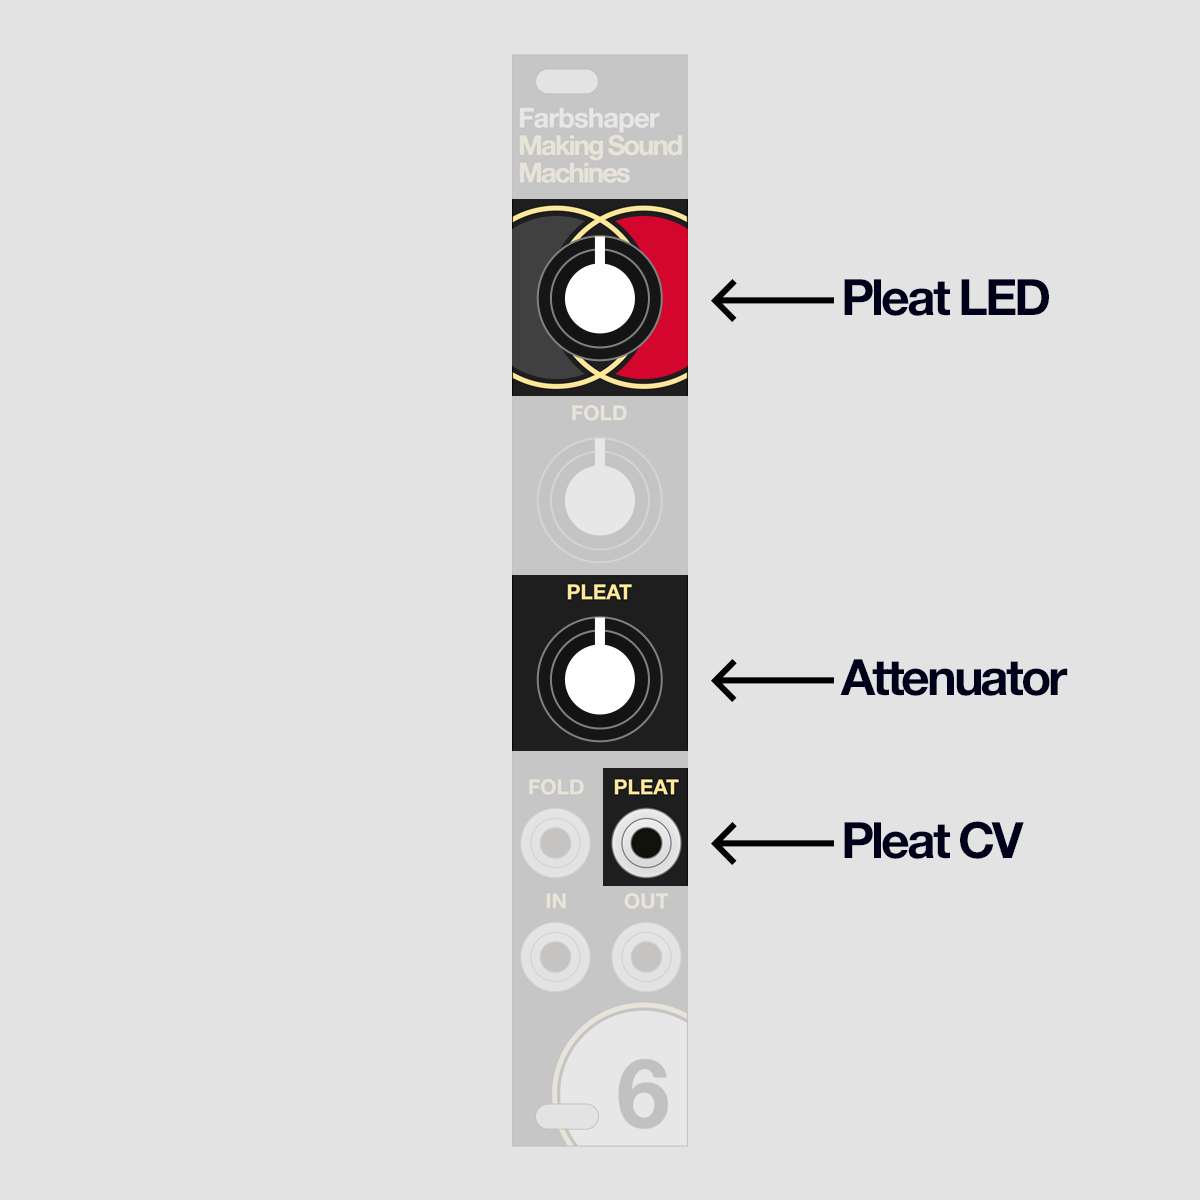
Pleat comes with a CV input (top right jack).
If a signal is present here, the Pleat knob becomes an input attenuator.
Patch an envelope or LFO to this input to produce vividly animated timbre changes.
Explore how modulation of Fold and Pleat CV, and attenuating each of them differently, leads to varied timbral results.
The Pleat input accepts a 0 - 10V range.
Getting Started
Set Gain and Fold to 9 o'clock and turn Pleat down (fully counterclockwise). Patch a sine oscillator at around C2 (65.4 Hz) into the Audio In.
Sweep Gain. Sweeping clockwise, you will notice a short clean onset, then a steep increase in overtones resulting in a brassy tone. There is a plateau towards the end of the range.
Even without changing the Fold knob, you will notice the timbre changing substantially with the amount of gain you set at the input.
This is a helpful realisation if you want to process sounds with an amplitude envelope.
Similar to a lowpass gate, a volume change in the incoming sound will automatically animate the timbre as well.
Set Gain to full and sweep the Fold knob. This will progressively increase the folding effect, adding overtones until you arrive at a bright timbre.
The higher you set the Fold knob, the quicker the sound will fade away if you dial the Gain knob counterclockwise.
This means that on sounds with a volume envelope, you will not only affect the timbre to make them brighter or more muted, but also make them snappier depending on the settings you chose on Farbshaper.
On a sinusoidal signal like a simple drum tone, you can achieve an interesting interplay between bright sounds with a snappy envelope, and a more muted tone with longer decay by tweaking Gain and Fold.
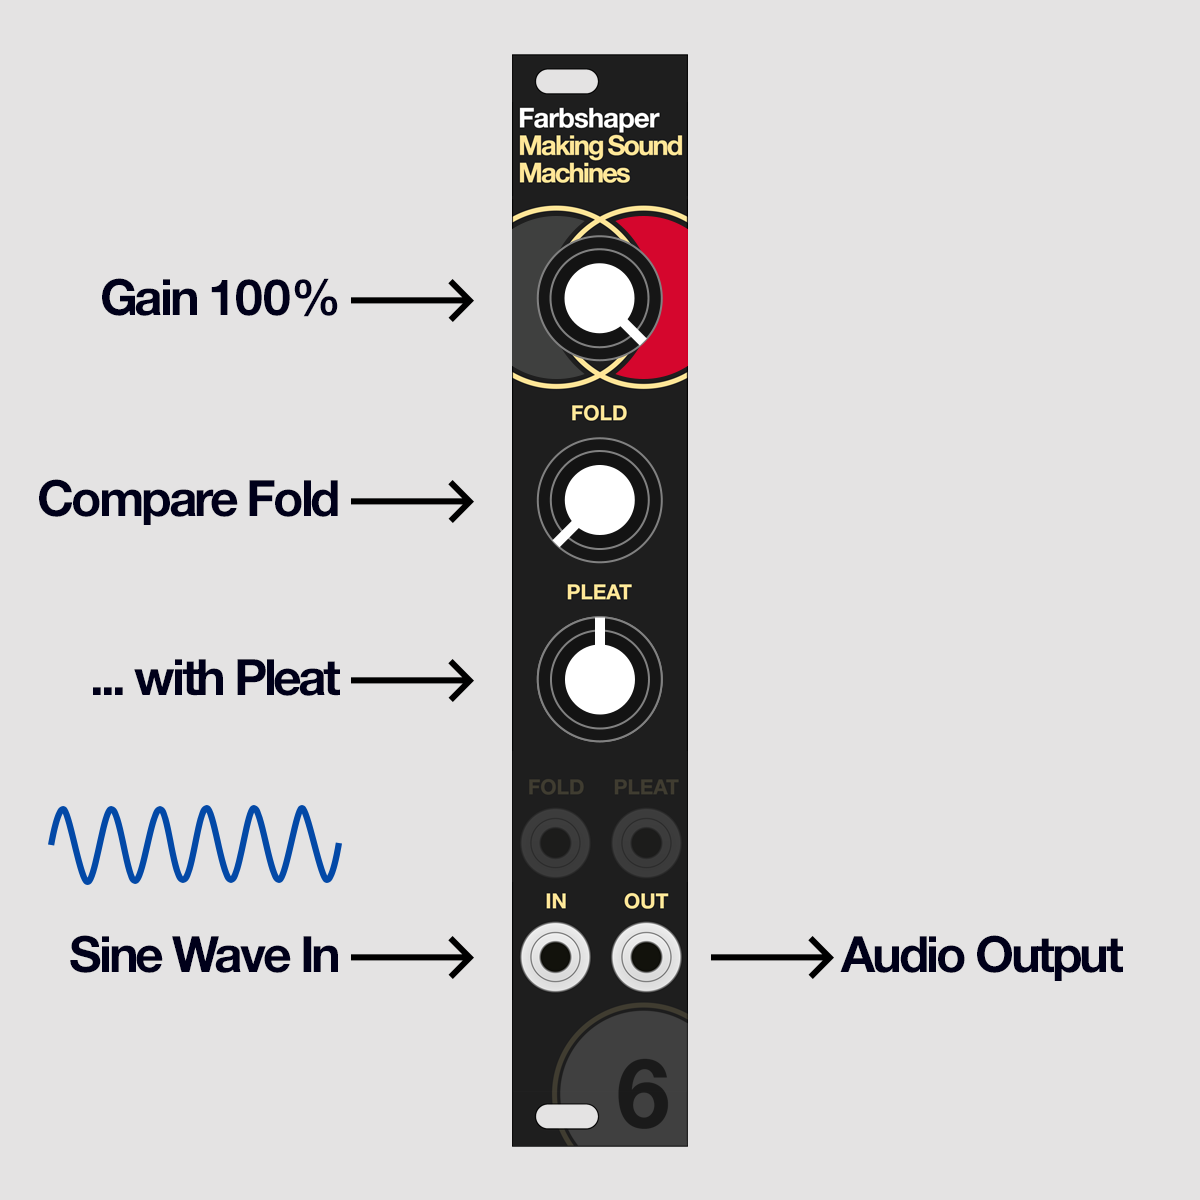
With Gain set to full and Fold turned down, sweep the Pleat knob.
Experiment with giving the Pleat knob a full sweep and back, then sweep the Fold knob.
You will notice that there is quite a difference in character, with the Pleat circuit giving a brighter and the Fold circuit a more gentle result.
You will find a similar link between Gain and Pleat as you explored with Gain and Fold.
This means that for the amplitude-timbre interaction as described above, you have two different shaping circuits to choose from, which you can mix and match.
Take some time to play and explore how the Pleat, Fold and Gain knobs interact.
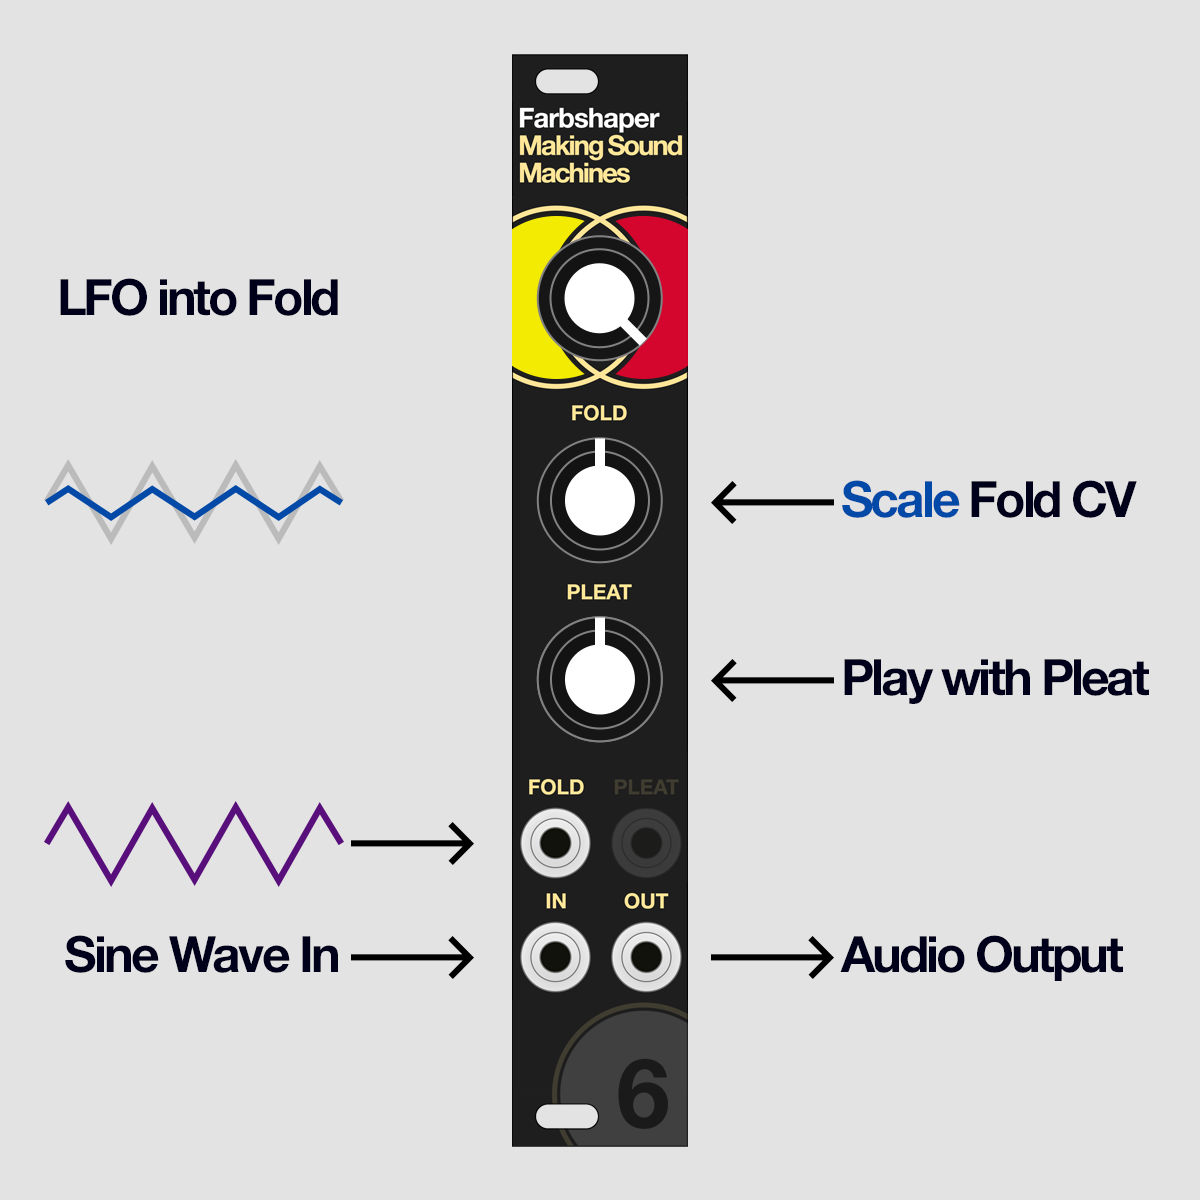
Patch an LFO into Fold CV. Scale the LFO range using the Fold knob - all the way counterclockwise, you will hear no modulation.
With Fold at around 9 o'clock the circuit will produce a pronounced "double articulation", creating an interesting brassy sound.
Fold CV is a great point to patch a synth voice’s envelope to emphasize the timbre alongside the shape of the amplitude. This is a great alternative to a filter envelope.
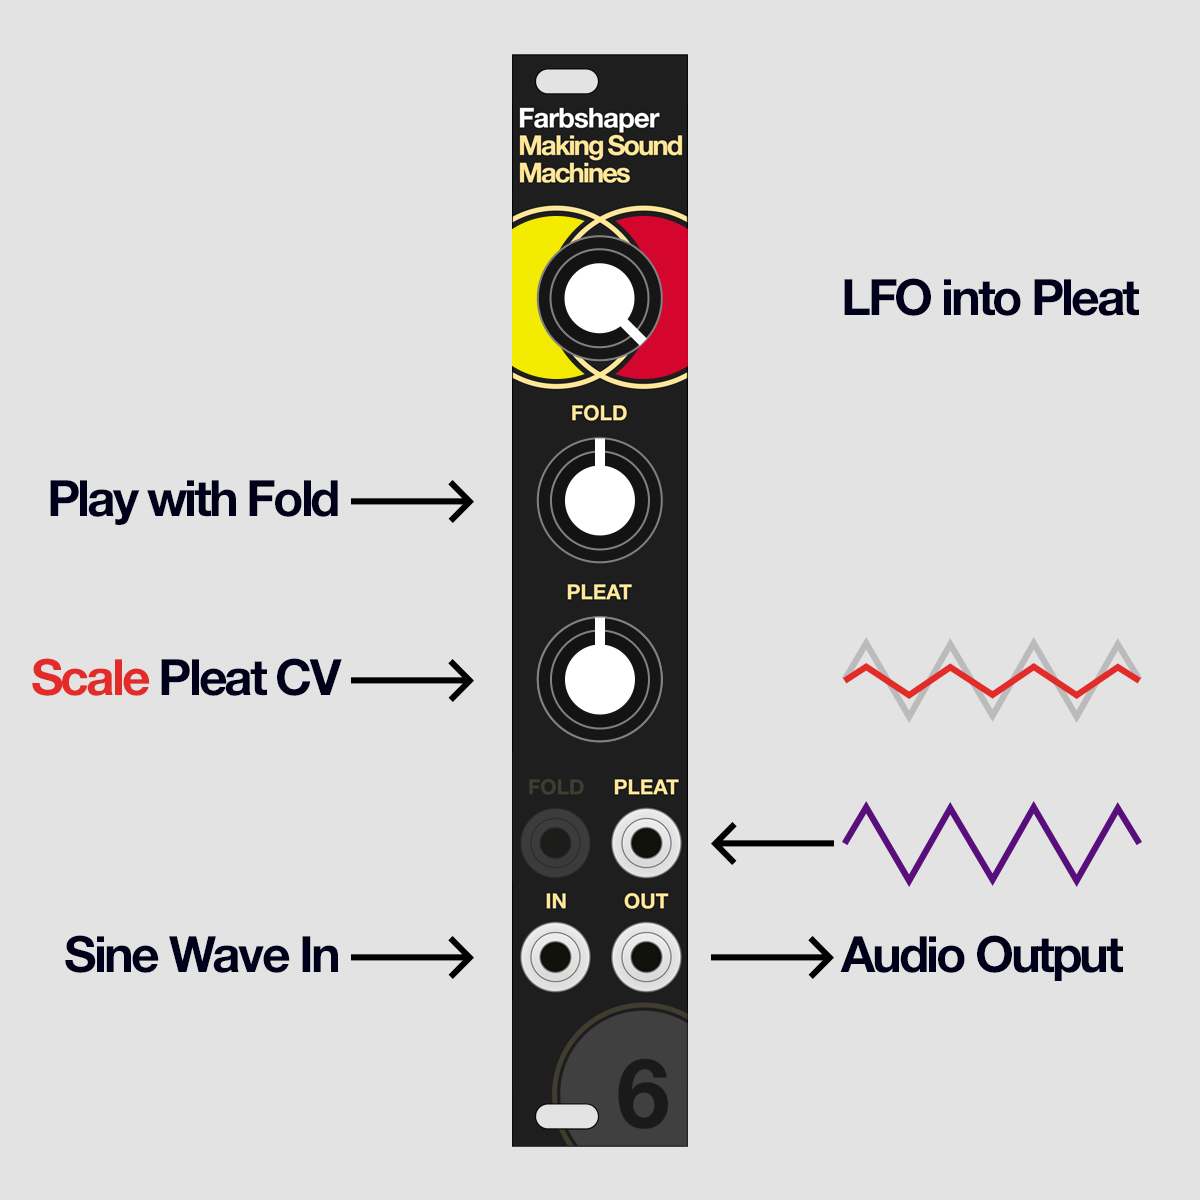
Feed an LFO into Pleat CV. Scale the LFO range using the Pleat knob.
Experiment with Gain and Fold, and how these parameters interact.
Try various modulation shapes and speed. Anything including audio rate modulation leads to great results and can be flexibly dialled in using the knobs.
As with Fold CV, try patching a synth voice’s envelope here to affect the timbre alongside the shape of the amplitude.
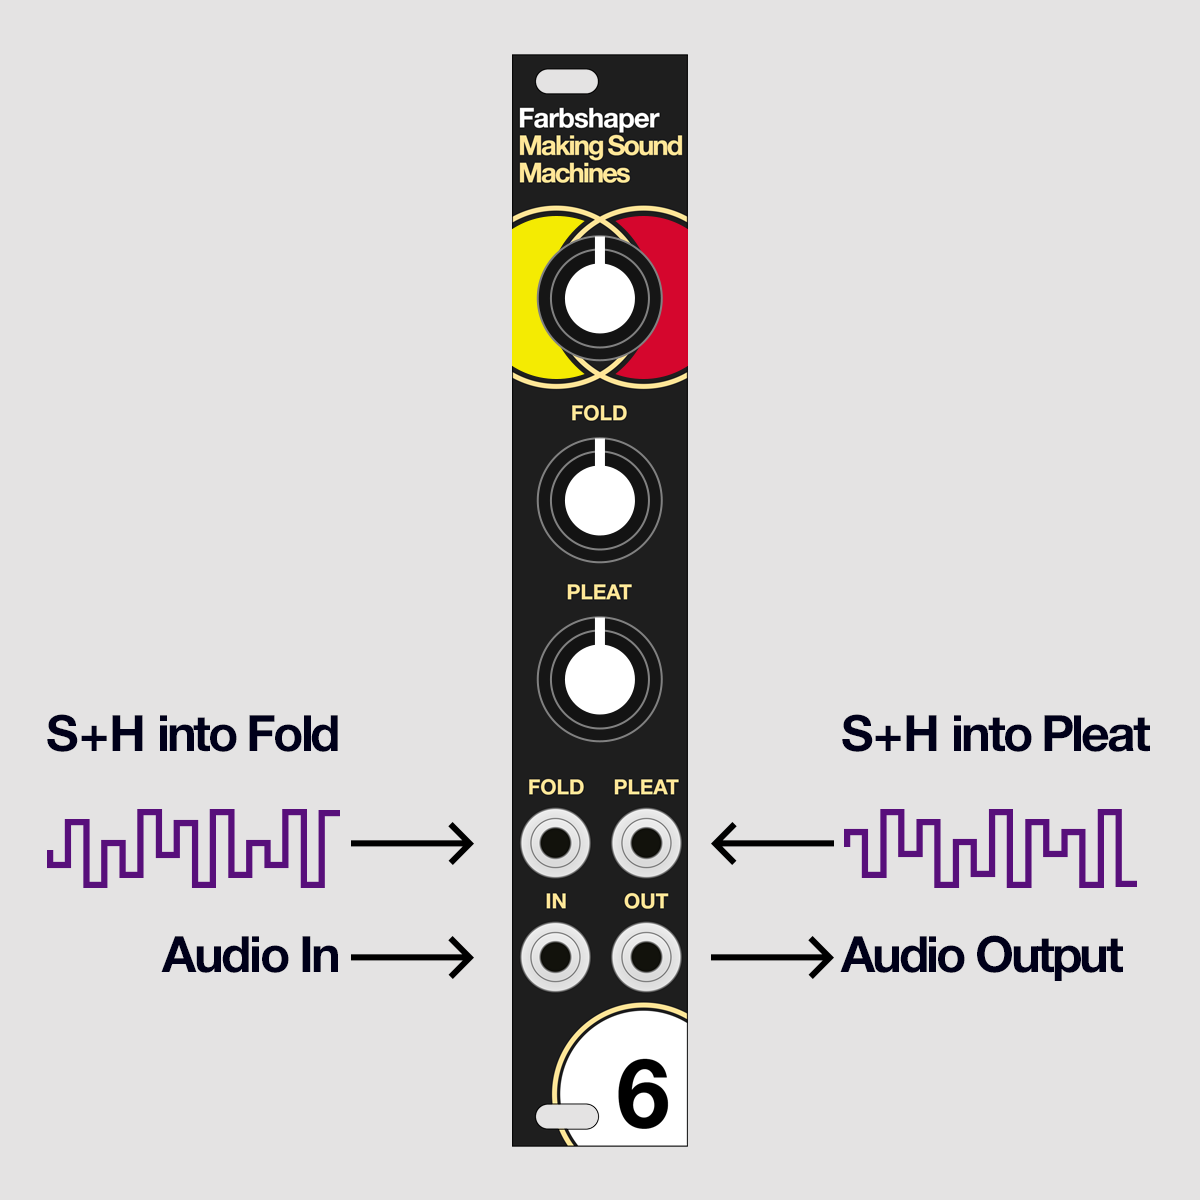
Finally patch a Sample and Hold into Fold CV and Pleat CV at the same time.
You will get lively, constantly evolving timbres.
If you own two Farbshaper modules, or double track the same signal with a recording setup, this will make for a smashing stereo effect.
Explore#
We hope this short tutorial section has inspired you to start experimenting with your own settings and sonic material. Acoustic sounds and drum machine patterns are an equally fascinating jumping off point to process with this module.
Enjoy Farbshaping - and if you make something you like, do not hesitate to share the results!
Thank you#
Thank you for your time, enthusiasm and care, sharing insights and advice.
Stijn and Priscilla – TiNRS This is Not Rocket Science Lauri – Vaski Embedded Manu – Befaco Ben – DivKid
The DIY community and the shops propelling synth DIY forward.
Steve, Will and Will – Thonk Manuel and Hagen – Exploding Shed Daniel and Madeleine – Mülheim Modular Joe Proswell – dsp.coffee